This tutorial is a follow on from Creating a Looping Animation in MotionBuilder, showing you how to edit a traversing animation like a walk or run so that it loops on the spot
There are two ways to do this in MotionBuilder:
Using In Place Mode
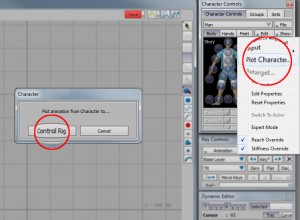
- Plot the take to a Control Rig. If the animation isn’t already on a Control Rig, in the “Character Controls” panel select Edit>Plot Character…>Control Rig and if prompted create an FK/IK rig. Set the options in the Character Pop up window to your specific scene requirements and click Plot.
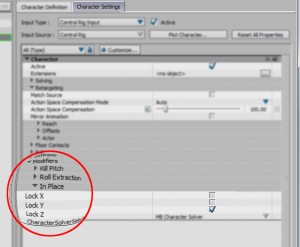
- Lock the translation of the character. In the Character Settings tab under Character >> Modifiers >> In Place there is the option to Lock the X, Y and Z translations of the control rig.Tick the box that corresponds to the axis or axes your character is traversing along to lock the character in place.
- One problem you may find when using In Place mode is it can be very difficult to edit the animation while the Control Rig is locked in place. The Control Rig will continue to move as it did in the original animation while the character remains locked in place. This breaks the feeling of editing on the character, especially if you are in “Model Only” view. I would recommend completing all your editing before locking your character in place or temporarily activating it to test Base Poses and edits are working correctly.
- Re-Crentre the character. If the character moves from the centre of the scene when you activate In Place mode it is possible to re-center it.
- Copy the Global position (F6) of the top node of your character’s skeleton, this is usually the hips.
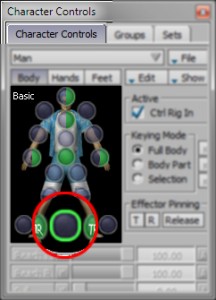
- Select the Character Control Root and paste the inverse value of the hip position on to it. (i.e. Hip Z Translation = 70 CharacterCrtl Z Translation = -70 )
- Plot the take to the Skeleton. When you are happy everything is working correctly and all the editing is complete, plot the animation to your skeleton. In the Character Controls select Edit>Plot Character….>Skeleton.
Deleting Key Frames in the FCurve window
- Select the character’s hips. Select the character’s hips in either X-ray mode in a camera view (Ctrl+a) or switch to Schematic View (Ctrl+w) and select the node there.
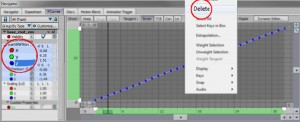
- Select the channel to delete. First identify which axis the character is traversing along.Then in the Navigator >> FCurves tab select the Translation channel the character is traveling down from the Properties Pane on the left side of the FCurves tab. As a rough guide if you have the correct channel the keys should appear to form a diagonal line across the FCurve pane.
- Drag Select all the keys except the first one in the FCurve pane. Still in the FCurve pane right click and select Delete from the pop up menu.This should remove the translation from the animation and the character should be animating on the spot.
- Re-Centre the character. If you need to re-centre the character you can select the remaining translation key and change it’s value to zero. This will reposition the character to the centre of the scene.


Leave a Reply