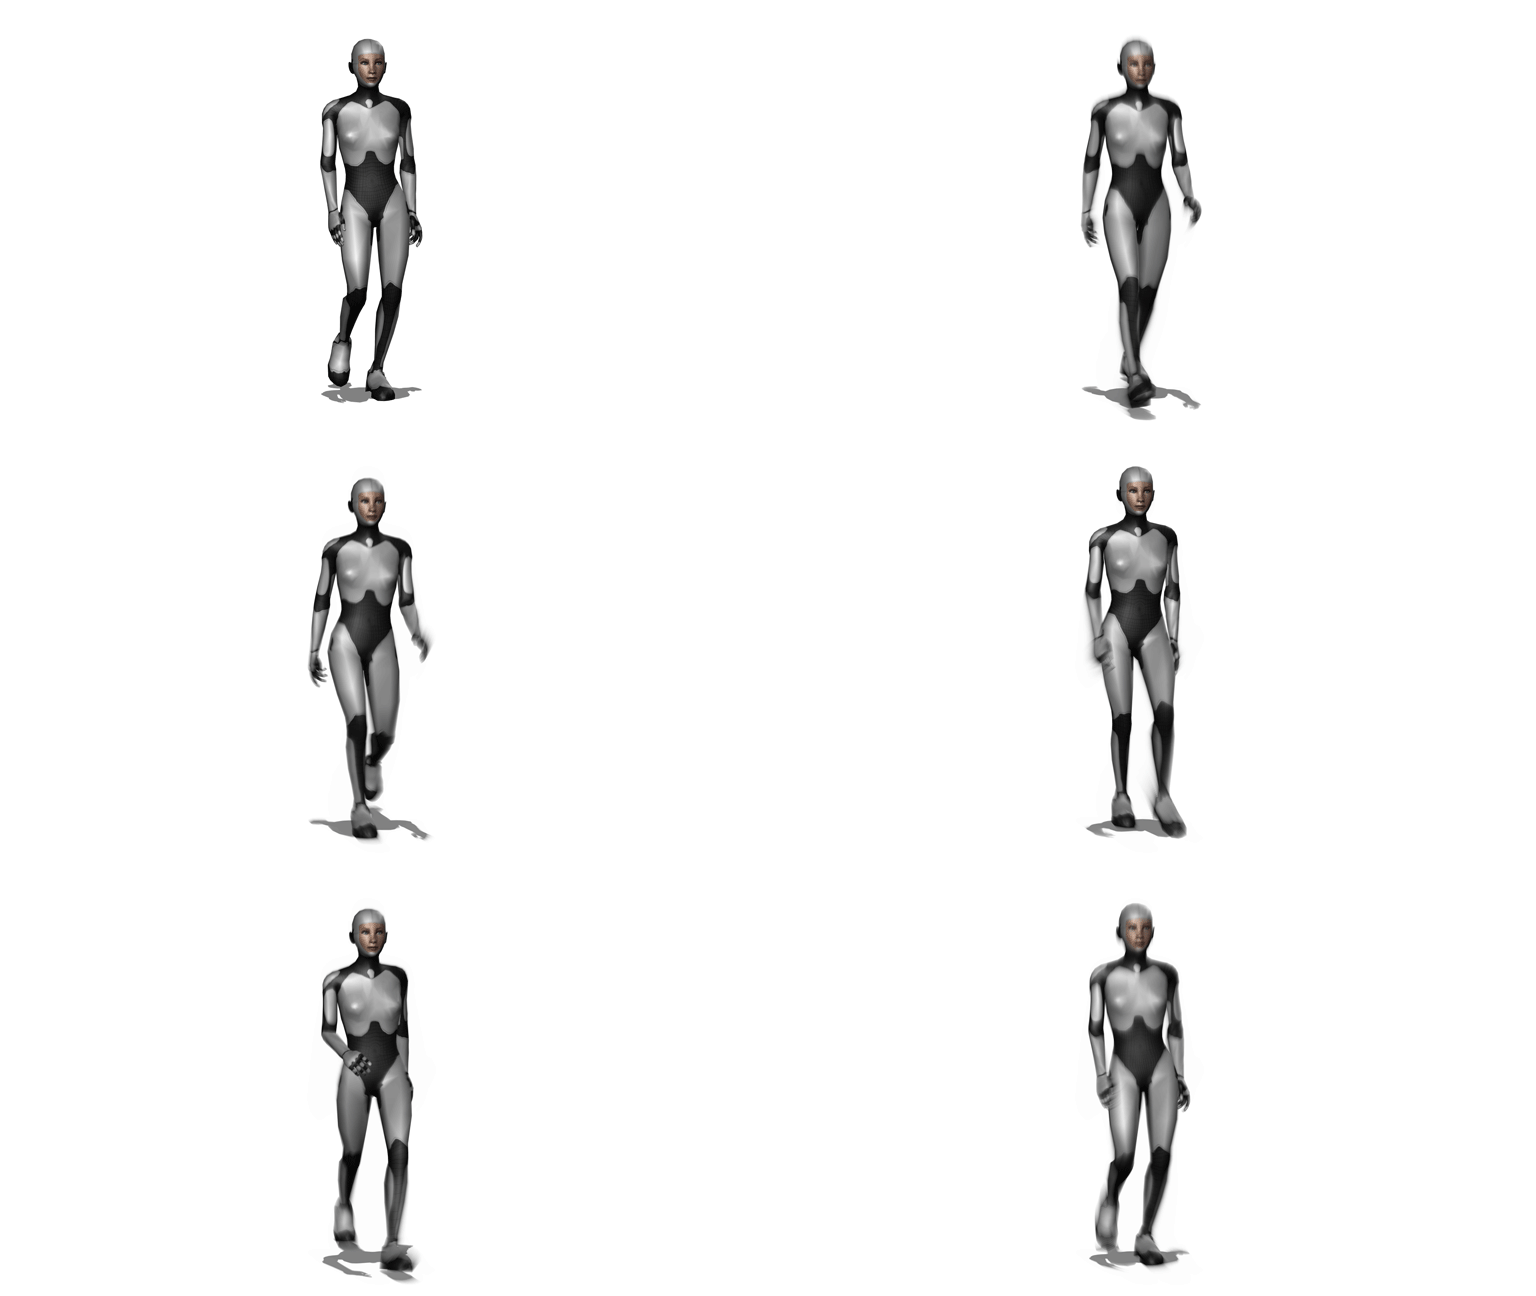
Creating a walk cycle using motion Capture is one of the best ways to learn the tools and techniques you’ll need for motion editing in MotionBuilder.
In this tutorial you’ll learn:
- How to Import Mocap Data
- How to Select a “Loop-able” clip in Story
- How to Fix Foot Sliding
- How to Create and Apply Poses
- How to Edit Mocap
- How to Export Animation
01 Import Walk Mocap data
The first thing to do is import the motion captured walk data onto your character. The mocap data should be clean – all markers identified, gaps filled, swaps resolved, etc. – and solved or retargeted to the same skeleton as your character. The character you are importing the data onto MUST be Characterized.
Open a Clean Character File
Rather than working on the file you used to retarget the mocap data, open a “clean” version of the characterized character and import the solved mocap data onto that.
This helps avoid errors and unwanted nodes in the scene.
IMPORTANT: THE CHARACTER MUST BE CHARACTERIZED
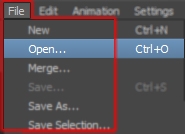
- File > Open… a character: From the File menu select Open… and use the Open File browser to select a file containing a “clean” characterized character.
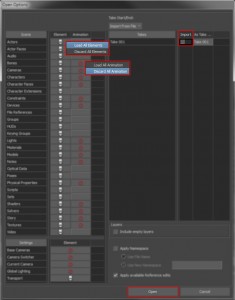
- Set Open Options: In the Open Option window set the following options:
- Load All Elements: In the Scene section, right-click in the Elements column and select Load All Elements from the pop-up window. This will load all the elements in the scene file.
- Discard All Animation: In the Scene section, right-click in the Animation column and select Discard All Animation from the menu. This makes sure the objects in the scene you are about to load DO NOT contain any animation.
- Discard All Takes: In the Takes section, left-click the word Import at the top of the Import column. This will deselect all the Takes in the file so when it opens there will only be one empty take named “Take 001”.
- Open: Finally, click Open.
Import Options
Before you import the motion capture onto your character, you need to decide where you want the key frames to be applied. The Import Options dialogue box lets you to specify how and where the mocap is imported based on the objects you select.
In Selected Hierarchy
Imports the animation onto all the objects in the hierarchy by finding the root node of the selected object. This option may not be suitable for complex rigs where you want to avoid importing animation onto certain objects.
In Selected Model and Children
Imports the animation in to a continuous hierarchy of objects, using the selected object as the root. This option can be used to import animation onto a section of the body. For example, select the shoulder joint to import the animation onto the entire arm.
In Selected Models Only
Imports the animation onto the selected objects ONLY. This option can be used to avoid importing animation onto objects that don’t require it and could cause an error. For example, constraints set-ups. PLEASE NOTE: The selected objects MUST be a continuous parent child hierarchy or the import will fail e.g. Left Shoulder>Elbow>Wrist NOT Left Shoulder>Wrist
Select Import Objects
Once you have decided how and where you want to import the motion capture, you need select the appropriate objects using one of the following methods:
…using Single Left-Click
To import animation onto a single object or onto a hierarchy.
- Switch to X-Ray or Schematic View: With your pointer over the Viewer window press Ctrl+a to switch to X-Ray mode or press Ctrl+w to switch to Schematic View.
- Select an Object: In the Viewer window or Scene Browser, Left-Click a single object or an object in the hierarchy you want to import the animation on to.
…using Selection Masks
To import animation onto specific types of objects.
- Turn on Selection Mask: Turn on the appropriate selection mask in the Viewer window. For instance, turn on the Skeleton Selection mask to only select Skeleton joints.
- Switch to X-Ray or Schematic View With your pointer over the Viewer window press Ctrl+a to switch to X-Ray mode or press Ctrl+w to switch to Schematic View. Press f to frame everything in the window.
- Drag Select All Objects: Left-Click+Drag over the all the objects in the scene. Only the objects included in the selection mask will be selected.
…using Naming Conventions
To import animation onto objects that have a specific naming convention.
- Switch to Schematic View: With your pointer over the Viewer window press Ctrl+w or use the Viewer>View>Schematic menu option.
- Find By Name: Right-Click in the Viewer window and select Find By Name… from the pop up menu. In the Enter model name: box, type the name of the models you want to select, including the namespace and wildcards (*). For example, “*_jnt” or “Male:*_skel”
- Select By Namespace: From the Edit menu, choose Select By Namespace… In the Select By Namespace window, click the required namespace, followed by Select branch. Finally click Ok to select all the objects in that namespace.
Import Walk Mocap
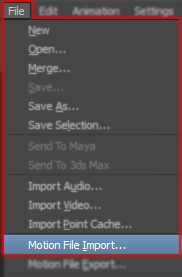
- File > Motion File Import… the Walk: From the File menu select Motion File Import… and use the Import File browser to select the file contacting the motion captured walk. Click Open to import the file.
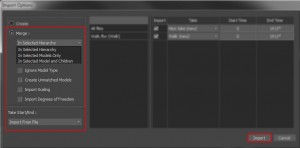
- Set Import Options: In the Import Options window set the following options:
- Select How to Import Mocap: In the Merge area, select how to import the mocap using the Merge drop down menu. This should be based on the choices you made in the previous steps.
- Deselect Options: In the Merge area, turn off the remaining options.
- Set Take/Start End: From the Take Start/End drop down menu, select Import From File. This sets the start and end frames of the take in your scene to match the file you are importing.
- Import: Finally, click Import.
Warnings
During the import you may get a warning saying that MotionBuilder couldn’t match all the models in your scene. This is usually due to a mismatch between the number of objects in the scene and the number of objects in the file you are importing.
If the character rig in your scene is the same as the rig in the file you are importing, this shouldn’t be a problem and you can ignore the warning and click Continue.
If the character rig in your scene is NOT the same as the rig in the file you are importing, you will need check both rigs have the same number of joints, the same hierarchy and the same joint names before you continue.
Import Issues
- Incorrect Animation: Check the name of the file you are importing and that the correct performer and frame range were processed to the correct character.
- No Animation: Check the names of the objects in the file you are importing match the names of the objects in your scene. Also check the motion capture in the scene you are importing has been plotted/baked to the objects.
- Missing Animation: If the mocap has not imported onto all the joints in the character, check ALL the joint names in both files are identical. If the any of the object names are different, the import will fail at that point and the remaining mocap will not be imported.
Save File
Once the walk mocap has been successfully imported, save a version of the file. This gives you a version of the file you can return to if anything goes wrong during the editing process – for instance, if the accidental Ctrl+s instead of Ctrl+a moment happens.
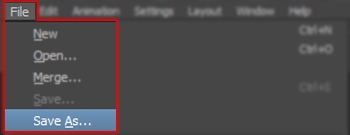
- Save the File: From the File menu select Save As… and use the Save File browser to navigate to a location you want to save the file.
- Set the File Name: Try to use a file name that describes what the file contains, for example <CHARACTER_NAME>_<DESCRIPTION_OF_ACTION>.fbx. Also think about adding “_EDIT_” and a version number “*_V001” to the file name. For example, “Hero_WalkCycle_EDIT_V001.fbx”.
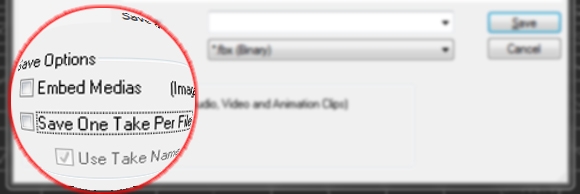
- DO NOT Save One Take Per File: Un-tick the Save One Take Per File option in the Save File browser.
- Set Save Options: In the Save Option window set the following options:
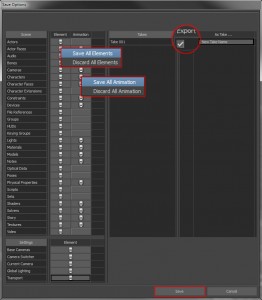
- Save All Elements: In the Scene section, right-click in the Elements column and select Save All Elements from the pop-up window. This saves all the elements in the scene.
- Save All Animation: In the Scene section, right-click in the Animation column and select Save All Animation from the pop-up menu. This saves the animation for all the elements in the scene.
- Transport Settings: In the Settings section, right-click in the Element column and select Save All Settings from the pop-up window.
- Save All Takes: In the Takes section, select the individual takes you want to save or left-click the Export column title to select all the takes in the file.
- Save: Finally, click Save.
02 Create Loopable Clip
Once the motion capture has been imported, you can use the Story tool to create a “loop-able” clip of animation. There are 2 important things to pay attention to when selecting the part of the mocap to use: the speed the character is moving and how closely the first and last frames of the chosen section match.
Constant Speed
The first thing you will need to do is to select a section of the walk where the character is moving at a constant speed. This usually happens around the middle of the walk or capture volume, when the performer has hit their stride. At the start and end of the walk, the performer will be leaning forwards or backwards as well as speeding up or slowing down. This change in speed and pose will make it difficult to create a natural looking walk cycle.
Easily Identifiable Pose
The next step is to find 2 poses to use as start and end frames that match as closely as possible. The closer these 2 poses match, the easier it will be to make the clip loop. In most situations a Passing Pose, where one foot is planted on the floor and the other foot lines up with the lower leg as it “passes”, is a good pose to use. The pose is easy to find in the motion capture and it also works well for most blending situation. The planted foot provides a stationary object to align the clip with and the “passing” leg helps hide the blend during the natural foot movement.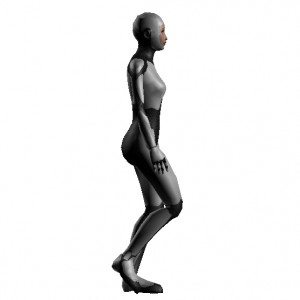
It is possible to use start and end frames that do not match but the closer they do, the easier it will be to make the clip loop.
Add Character to Story
- Turn on Story: Turn on Story mode in either the Transport Controls or the Story Window.
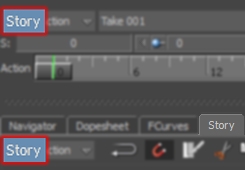
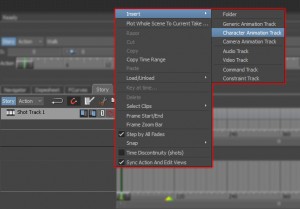
- Create a Character Animation Track: In the Story window Right-Click in the Action Timeline and select Insert>Character Animation Track from the pop-up menu.
- Assign the Character to the Story Track In the Character Animation Track, select the character’s name from the …Character drop-down menu.
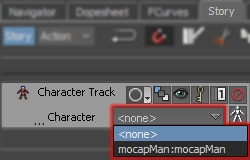
Trim the Clip
- Insert Current Take: In the Action Timeline of the Character Track, Right-Click and select Insert Current Take from the pop-up menu. This adds the animation in the current take to the Story tool.
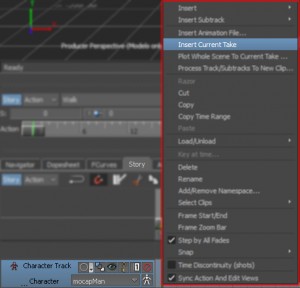
- Frame Clip: Select the clip and press “f” to frame it in the Action Timeline.
- Find Start Pose: Play through the mocap to find a section of the walk where the character is moving at a constant speed and the first and last “Passing Poses” match as closely as possible.REMEMBER: the closer the poses match, the less editing you will need to do.
- Trim Clip: Before you begin, positions the Time Slider on the frame containing the “Passing Pose”. In the Story tool set Loop/Scale Clip to Loop. Position your cursor over the beginning of the Animation Track until it changes to a double-ended arrow. Then Left-Click-Drag the edge of the clip to the Time Slider – the Trim Tool should snap to Time Slider. Alternatively, double-click the number in the bottom left corner of the clip and enter the start frame number.
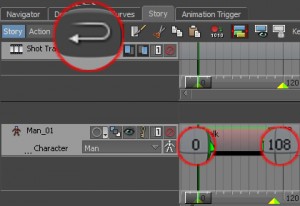
- Find End Pose: Repeat steps 3 and 4 to create the end pose.
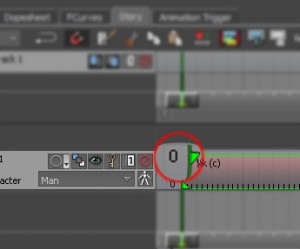
- Set Start Frame to 1: Double-click the number in the top left corner of the clip, type in 1 and hit Enter. Alternatively, move the Time Slider to frame 1 and Left-Click Drag the clip to the time-slider. The clip will snap to the time-slider making it easier to position, especially if the clip is very long.
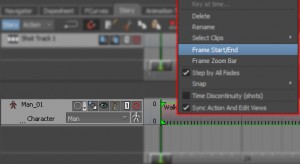
- Frame Start/End: Right-Click in the Story track and select Frame Start/End from the pop-up menu. This will reset the start and end values of the Take to match the clip.
Align Animation
- Switch to Normal or X-Ray Mode: Press Ctrl+a in the Viewer window or use the Viewer>Display menu to switch to Normal or X-Ray mode. If you are in Model Only mode the track’s Ghost, created in the next step, will not be visible.
- Show Ghost: In the Character Track turn on Show/Hide Ghosts. The “Ghost” represents the start and end position of the character, joined by a straight line. A “Ghost” of the character’s skeleton is also displayed but it is usually hidden behind the character.
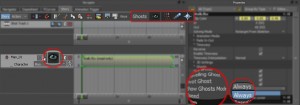
- Deselect everything. Before you align the clip in the next step, you need to make sure you have nothing else selected. To do this, Double-Click in an empty area of the Viewer window or press Shift+d. If you have another object selected with the clip, the position values for the clip will be displayed relative to that object rather than the root of the clip. This makes the next steps less accurate.
- Centre the Action: Switch to Translation mode (t). Left-Click the clip in the Story tool (the border should change to green) and type “0” (zero) in the X, Y and Z Global/Local fields in the bottom right corner of the Viewer window.
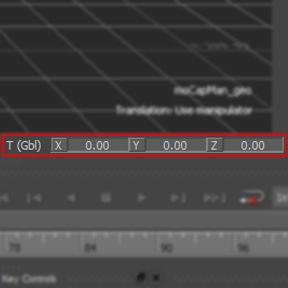
- Align to Floor: Still in Translation mode, adjust the Y value of the clip to makes sure the characters feet are above the floor.
- Align Down Positive Z: With the clip still selected, type “0, -90, 0” in the X, Y and Z Global/Local field. This will align the walk along the positive Z axis. You can also use the Rotate Manipulator (r) to align the clip manually, using the line between the start and end position of the clip as a guide. This techniques is often used to align animation for a game engine or simulation. Always check how the character’s locomotion needs to be aligned for the project you are working on.
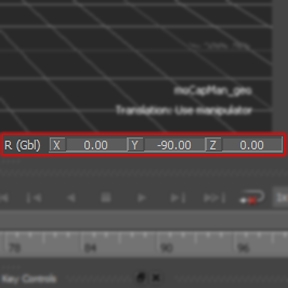
- Check the Loop: Turn on Continuous Playback in the Transport Controls and check the overall appearance of the walk cycle using the different orthographic and perspective views. The speed of the walk should be constant and the difference between the first and last frames should be as small as possible. Remember: the better the walk loops at this stage, the less editing you will have to do later.
Plot to Control Rig
Once you have created a “loop-able” clip of animation in the Story tool, you need to plot or bake the animation to a Control Rig so you can begin editing it.
- Plot Character… to Control Rig: In the Scene Browser>Characters>”CHARACTER_NAME” Character Settings tab click Plot Character…. In the Character pop-up window click Control Rig. Alternatively, in the Character Controls window select Bake(Plot) > Bake (plot) To Control Rig…
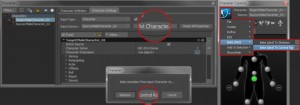
- Create FK/IK Rig: If your character doesn’t have a Control Rig attached to it, the Create Control Rig window will be displayed. Simply click FK/IK button to create and FK/IK control rig for your character.
- Set Plot Options: Set the following Plot Options in the Character pop-up window and click Plot:
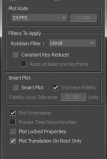
- Plot On Frame = ON
- Plot All Takes = OFF – unless there are multiple take ready to plot
- Plot Rate = Match the frame rate in the Transport Controls>Time Format Menu
- Rotation Filter = Unroll
- Constant Key Reducer = OFF
- Smart Plot = OFF
- Plot Locked Properties = OFF
- Plot Translation On Root Only = ON
- Turn Story Off: When the plotting is complete, turn off Story mode in the Transport Controls or Mute the Story Track and turn off Story in the Story window. Do not delete the track just yet in case the loop doesn’t work as well as you’d hoped.
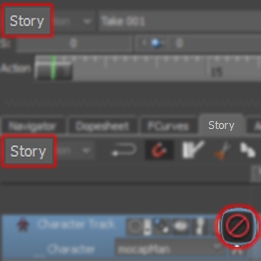
- Check Playback: Play the animation to check the character still moves in the same way as it did before Story was turned off. If it doesn’t, try turning Story back on and repeat steps 1-4.
Save File
Before you begin editing the file, this is a good stage in the process to save a version of the file – V002 if you’re playing along at home.
03 Fix Toe Floor Contacts
There can be lots of reasons the toes of the character don’t contact with the floor in the same way as the performers did. The foot has 3 main points of contact it pivots around during a walk: Heel, Ball and Toe. If the performer and character have different sized feet, these pivot points will be in different places. Differences in footwear will also have the same effect, as well as causing the toes to bend in different ways. Also, the toes may not have been captured or solved correctly – or even at all.
One thing to think about before you spend time fixing the toe-floor contact: Will all your hard work will be seen? Check the character’s toes will be visible in the final render and that they’re not going to be too small to see all that fine detail you’ve created.
Plot Toe Effectors
The first stage of the process is to plot all the animation onto the Toe Effectors to make sure they are synchronised with the Ankles/Feet.
- Select Character Toes: Ctrl+Left-Click select the Left and Right Toe Base in the Character Controls>Controls tab or the Left and Right Foot Effectors in the Viewer window.
- Set Toes IK Blend to 100.00: With the Toe Base Effectors selected, set the IK Blend T and R to 100.00.
- Plot Selected Properties: In Key Controls, set the Keying Mode to TR and select Plot Selected (Selected Properties) from the Animation menu. This will make sure the Toe Effectors are synchronised with the Ankle Effectors so the feet don’t move when you remove the IK Blend in the next step.
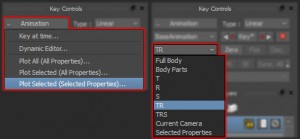
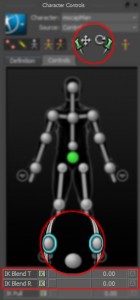
- Set Ankle IK Blend to 0.00: In the Character Controls>Controls tab select the Left and Right Ankle Effectors and set the IK Blend T and R to 0.00.
- Unpin Ankles: With the Ankle Effector still selected, un-pin their Translation and Rotation (w and e). If the ankles are pinned you won’t be able to adjust the position of feet with the Toe Effectors.
Fix Foot Slide
With the animation plotted to the Toe Effectors, we can begin to stabilise the position of the toes in the FCurves window. The following method can be used to stabilise both feet.
- Switch to Base Animation: Select the Toe Effector and switch to the BaseAnimation layer in the Animation Layers window.
- Select Translation X and Z in FCurves window: In the FCurves window select the X and Z Translation channels and press “a” to frame all the key frames.
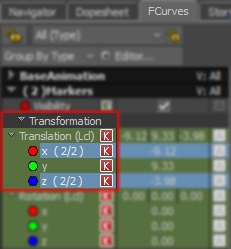
- Find the “Contact” Frame: In a side Orthographic view, scrub through the animation to find the frame just after the ball of the foot first makes contact with the floor. The foot should be stationary on this frame of the animation as it is now taking the weight of the character’s body.
- Copy the Contact Frame: In the FCurves window, drag select the X and Z key on this frame and copy them – Ctrl+C or Right-Click Edit > Copy. It’s also worth making a note of the frame number for later.
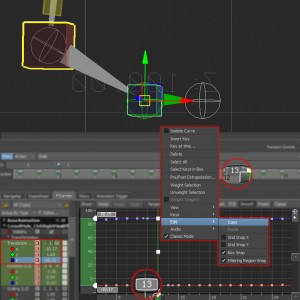
- Paste on “Lift” Frame: Scrub through the animation to the frame where the ball of the foot begins to lift off the floor and move forwards – in the FCurves window the Translate Z FCurve will begin curve up. Select the X and Z key on this frame and Paste (Ctrl+v or Right-Click Edit > Paste) the “Contact” frame from the previous step onto this frame.
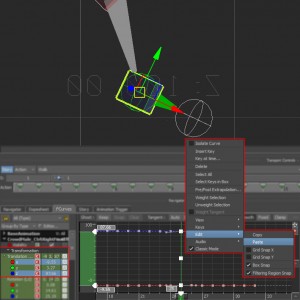
- Delete Planted Key Frames: In the FCurves window, Left-Click-Drag select the key frames between the “Contact” and “Lift” frames – this is where making a note of the “Contact” in the earlier step frame comes in. Right-Click in the FCurves window and select Delete from the pop up menu or press Delete on the keyboard.
- Flatten Tangents: In the FCurves window, select the “Contact” and ”Lift” key frames and set their tangent handles to Flat – click Set Flat Left (User).

- Correct FCurves: If the toes were in different positions on the “Contact” and “Lift” frames, you must scale the key frames after the pasted “Contact” frame to remove the step in the curve. To do this, Left-Click-Drag select from the key frame after the pasted “Contact” frame to the highest point on the curve. Left-Click-Drag the white handle on the left side of the FCurves window up or down to remove the step. Scaling key frames in this way is much easier than adjusting their values individually, and it helps maintain the shape of the curve.
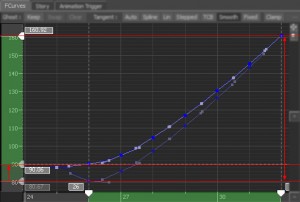
- Align Toes on Floor: In the FCurves window, select the Translation Y channel and Left-Click-Drag select the frames where the toes are on the floor. To align the toes to floor, Left-Click-Drag up or down in the centre of a green bar on the left of the FCurves window. Make sure the white handles at the top and bottom of the bar turn yellow as you do this, otherwise you will be scaling the key frames. The value of the Translation Y key frames can also be scaled down to reduce the vertical motion of the foot. Don’t worry if the tip of the toe goes through the floor for now, we’ll fix that next.
Edit Toe Contact
With the position of the toe stabilised, it’s time to correct the contact with the floor as they lift off.
- Switch to Layer 1: Select the Toe Effector and switch to AnimLayer1 in the Animation Layers window. If AnimLayer1 doesn’t exist, create one using the New Layer button.
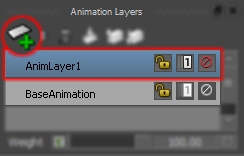
- Key Heel Lift: Using the Transport Controls, go to the frame where the heel of the foot begins to lift off the floor. Set a key frame using the Key Controls>Key* or hitting k on the keyboard.
- Key Toe-Lift: Go to the frame just after the toes leave the floor and set another key.
- Fix Toe Floor Contact: Step back 1 frame from the “Toe-Lift” frame. This should be the last frame where the toes are actually in contact with the floor. Adjust the local rotation of the toes (keyboard F5 then r) so they do not go through the floor, and set a key.
- Correct Toe Roll: In the FCurves window, select the Rotation channel for the toe curl followed by the “Heel Lift” and “Toe lift” key frames. Scrub between the “Heel Lift” and “Toe lift” frames to the frame where toe goes through the floor. Adjust the tangent handles on the key frames to correct as much of the toe-floor contact as possible. As a guide, set the “Heel Lift” key frame to “Set Flat Right (User)” and set the “Toe Lift” key frame to “Set Discontinuity Left (Auto)”. If the toe-floor contact cannot be fixed using the tangent handles, rotate the toes manually and create a key frame.
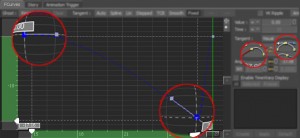
Plot Animation to Ankle Effectors
Once you have fixed the toe contacts for both feet, plot the animation onto the Ankle Effectors. This makes sure the Ankle and Toe effectors are synchronised again ready for the next step.
- Select Ankle Effectors: Ctrl+Left-Click select the Left and Right Ankle in the Character Controls>Controls tab or the Left and Right Ankle Effector in the Viewer window.
- Plot Selected Properties: In Key Controls, set the Keying Mode to Body Parts and select Plot Selected (Selected Properties) from the Animation menu.
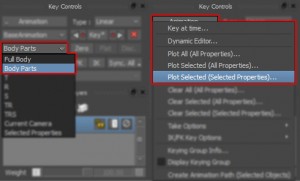
- Set Ankle IK Blend to 100.00: With the Ankle Effectors selected, set the IK Blend T and R to 100.00 – the characters feet should NOT move when you do this. If they do, remove the IK Blend and try re-plotting the animation.
- Pin the Ankles: With the Ankle Effector still selected, pin their Translation and Rotation in the Character Controls window or use keyboard shortcut “w” and “e”.
- Set Toe IK Blend to 0.00: In the Character Controls>Controls tab select the Left and Right Toe Base effectors and set the IK Blend T and R to 0.00.
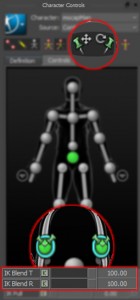
Save File
Now the toe-floor contact is correct, this is a good time to save a version of the file – V003 for those playing along at home.
04 Create Identical Start and End Frame
Once the toe floor contacts have been corrected, we need to pose the character so the first and last frames of the animation are identical. To do this we are going to use the Pose Controls.
The Pose Controls let you create a snapshot of a selected character’s Pose. This “snapshot” can then be “pasted” on to the character at a different frame, returning it to the “snapshot” pose. The Control Rig or individual body parts are keyed to fix them in the new pose. These key frames can then be edited to control exactly when each body part blends in to and out of the “Pose”.
Create Broken Hierarchy Control Rig
As we’re about to start editing the position of the character, it’s a good time to set some of the limits on the Control Rig. The following suggestions create a “Broken Hierarchy” style animation rig which may be more familiar to some animators. It allows you to rotate each body parts without affecting another and creates a “world space” IK set-up for the hands and feet.
- Select Main Limb Effectors: In the Character Controls window Ctrl+Left-Click select the following effectors:
- Head
- Spine End
- Left and Right Shoulders
- Left and Right Upper Legs
- Pin Rotations: With the above effectors selected, Pin their Rotations in the Character Controls window or press e on the keyboard.
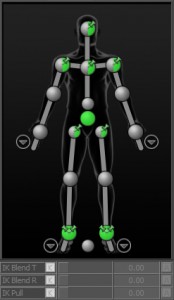
- Turn on Rotation IK: In the Character Controls window, set the IK Blend R to 100.00.
- Pin Wrists: In the Character Controls window select the Left and Right Wrist Effectors. Pin their Translation and Rotation and turn on IK Blend T and R.
Pose Character on First Frame
- Go to First Frame: In the Transport Controls go to the first frame by scrubbing, using the skip button, Ctrl+Home or Ctrl+Shift+Left-Clicking on the first frame.
- Create Animation Layer: In the Animation Layers window, switch to AnimLayer1 or add a New Layer if it doesn’t exists.

- Turn On Full Body Keying Mode: In the Character Controls window, turn on Full Body keying mode. As you’re going to be posing the entire character, it’s easier to use Fully Body key mode so you don’t forget to key anything.
- Pose Character: Using every camera view, enhance the pose to make it more “appealing” by removing some of these common problems:
- Correct Eye Line – Align the character’s head so it is looking in the correct direction
- Refine foot-floor contact – Rotate the planted foot to align it with the floor. Try not to translate the feet unless absolutely necessary. Lower the hips and feet instead.
- Align Hands and Knees. Align the hands with the forearms. Align the knees over the feet.
- Pose Spine – Check the character doesn’t look hunched over
- Pose Fingers – If the motion capture didn’t contain any finger animation, rotate the fingers into an appropriate pose for the type of walk.
- Check balance – Check the character is balanced. Rotate the hip effector to lean the character forward or backwards.
- Remove intersections – Remove any mesh intersections form the pose.
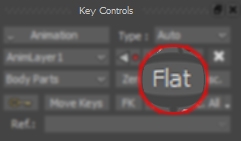
- Set Flat Key: When you are happy with the pose, set a Flat key in the Key Controls window.
Create Pose
Before you create a Pose, rotate the camera to frame the character in the Viewer window. This isn’t an essential step but as the Pose Controls create a thumbnail when you create the pose, it’s worth making the most of it. The thumbnail can be updated at any time by reframing the character, Right-Clicking the thumbnail in the Pose Controls and selecting Update Pose Thumbnail from the pop up menu.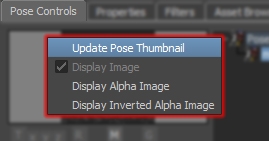
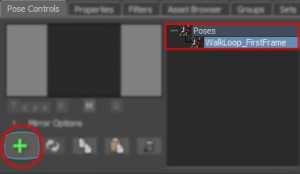
- Create Pose: In the Pose Controls window click Create. Once the pose has been created, you might need to expand the Poses branch to see it.
- Rename Pose: In the Pose Controls window, Right-Click the pose you’ve just created and select Rename from the pop-up menu. Rename the pose to something appropriate like “WalkLoop_FirstFrame”.
Paste Pose on Last Frame
- Go to Last Frame: Go to the last frame using the skip button, Ctrl+Shift+Left-Clicking the last frame or pressing Ctrl+End on the keyboard.
- Select Hips: In the Character Controls window, select the Hips effector. Before pasting a Pose you need to select a body part or Effector to align the pose with.
- Match Z Translation ONLY: In the Pose Controls window, turn OFF Match Translation X and Match Rotation (R) so ONLY Match Translation Z (Tz) is active. The “WalkLoop_FirstFrame” pose needs to match the character’s current translation along the Z axis but not its rotation or translation in X. These positions need to come from the “WalkLoop_FirstFrame” Pose.
- Paste Pose: In the Pose Controls window, Double-Click the “WalkLoop_FirstFrame” pose in the Poses branch or click the Paste button.
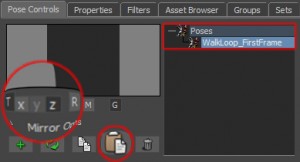
- Set Flat Key: In the Key Controls window, click the Flat key. This will set the tangents between the first and last frame to flat to stop any unwanted “drifting” between the key frames.
Check Poses
- Flip between First and Last Frames: Switch to Producer Front view using the View > Orthographic > Producer Front menu or Ctrl+f. Flip between the first and last frames (Ctrl+Home and Ctrl+End), to check the poses on the two frames are identical.
- Play Animation: In the Transport Controls, turn on Loop and play the animation. In the Producer Front View the animation should appear to continually loop. Ignore any foot sliding for now, we’ll fix that next.
- Using In-Place Mode: In the Character Settings tab of the Characters Window, select Lock Z from the Modifiers > In Place menu. As its name suggests, this option locks the translation of the character in the Z axis allowing you to check the quality of the loop in the perspective view and other orthographic views. Don’t forget to turn this off when you’re finished if you don’t want your character walking on the spot.
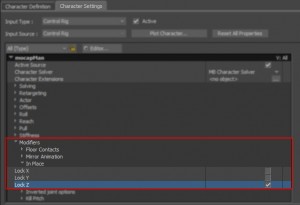
- Refine the Pose: If you change the Pose, don’t forget to up-date the “WalkLoop_FirstFrame” Pose in the Pose Controls window and reapply it to the opposite end of the animation.
Once the animation is looping nicely, the next step is to begin refining the animation and removing any artefacts that were created when the poses were applied.
05 Stabilise Feet
It is very unlikely the performer was in exactly the same pose on the first and last frame of the original animation. Applying the “Walk_Loop” poses will have created some kind of offset from the original position of the character’s foot. This offset will cause the character’s feet to slide or drift to their new positions during the animation. This kind of “foot slide” will be very obvious on the frames where the feet should be stationary. To correct this, we’re going to “hide” the transition or edit during the natural motion of the feet, one of the key principles in Motion Editing.
Stabilise Planted Foot
- Turn on Body Part: In the Character Controls window, turn on Body Part as we only want to edit the key frames on the Ankle Effector.
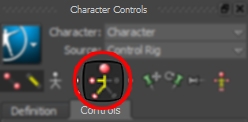
- Copy First Frame: Select the Ankle Effector of the planted foot, the one the character is standing on NOT the foot that is off the ground. In the Transport Controls select the key frame on the first frame and copy it using Right-Click > Copy or Ctrl+c on the keyboard.
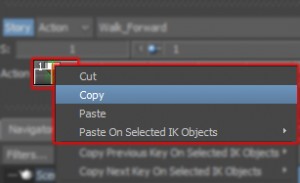
- Paste on Lift Frame: Scrub through the animation to the frame just before the character’s foot lifts off the floor. Paste the key frame from the previous step using Ctrl+v or Right-Click in the Transport controls and select Paste from the pop up menu. This will keep the foot locked in position while it’s planted on the floor.
- Copy Last Frame: In the Transport Controls, select the key frame on the last frame of the animation and copy it.
- Paste on Foot Contact: Scrub through the animation to the frame where the heel of the foot makes contact with the floor and paste the key. This applies the off-set created by the pose at the end of the animation to the point where the foot contacts the floor. As before, this helps lock the position of the while it is planted on the floor.
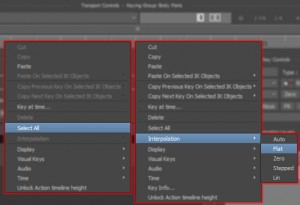
- Set Interpolation to Flat: Right-Click in the Transport Controls window and choose Select All from the pop up menu. With the key frames selected, Right-Click in the Transport Controls window again and select Interpolation > Flat from the pop up menu. Setting the interpolation to Flat stops the feet sliding because of the interpolation between the key frames.
Stabilise Passing Foot
- Key Heel Strike: Go to the first frame of the animation and select the Ankle Effector of the foot that isn’t on the floor. Scrub through the animation to find the frame where the heel of the foot first makes contact with the floor. In the Key Controls window set a Flat or Zero key frame. Setting a Zero key will return the foot to its original position which may not look good and require extra work to fix. If this happens, delete the Zero key and set a Flat key instead.
- Adjust Planted Foot: Using the Transport Controls, scrub forward to a frame where the foot is flat on the floor. Check the foot is aligned correctly and make any necessary adjustments. If you do make any changes, remember to set a key frame and copy and paste it over the “Heel Strike” key frame.
- Copy Heel Strike Key Frame: In the Transport Controls select the “Heel Strike” key frame and copy it.
- Paste on Foot Lift: Scrub through the animation to the frame just before the foot lifts off the floor and paste the key. This will help keep the foot planted in its new position while on the floor.
- Set Interpolation to Flat: Right-Click in the Transport Controls window and choose Select All from the pop up menu. With all the key frames selected, Right-Click again and select Interpolation > Flat from the pop up menu.
Save File
Before you begin editing the animation, this is another good stage in the process to save a version of the file – V004 if you’re playing along at home
Now the technical side of the motion editing is done, it’s to get artistic.
06 Edit Animation
The type of editing you need to do next will vary depending on the quality of the original mocap data and how you plan to use the final animation. To help get you started, I’m going to describe the general workflow and show you some of the tools and techniques to use. Hopefully this will help you build your own workflow or maybe give you a few ideas to enhance your existing one.
General Workflow
The following 5 step workflow will give you an overview of what you should be doing at each stage of the motion editing process. The main thing to remember is: the edits you make should enhance the existing performance not try to change it into something different.
- Review Video Reference: If you have video reference from the mocap shoot, always review it before you begin any editing. This is the performance you need to recreate and the one your work is going to be compared to. It’s vital you understand exactly how the action was performed and what emotion the performer was trying to convey. This is particularly important when editing human to non-human performances or actors playing characters with different proportions.
- Plan Your Edits: Once you’re familiar with the actor’s performance, play the mocap file back on a loop and view it from every angle. Compare what the character is doing in your scene to what the actors is doing in the video. Check the file you are about to edit matches the one in the video, that the characters are using the right actor performance and that the motion looks correct. Make a note of any errors to fix, refinements to make and missing detail to replace.
- Work from Big to Small: Don’t try to fix all the problems on the first frame by adjusting every part of the character. Work through your list of fixes one at a time, starting with the biggest issues first. For example, removing overextension in the legs. Once these have been corrected, move on the smaller ones like mesh intersections and joint alignment. When all the problems have been corrected, you can begin to look for ways to enhance the mocap.
- Enhance the Performance: Now you can start to enhance the action by making the poses more expressive and reintroducing detail that was lost from the original capture. The most important thing to remember is that you should always be enhancing the existing performance not trying to change it into something different. If you begin counter animating the action and creating lots of extra key frames, it might be time to think about recapturing or hand animating it to get the performance you want.
- Avoid Deleting Key Frames: Try to keep as much detail as possible from the original mocap take. Use animation layers or adjust the key frames on the BaseAnimation layer to edit the animation. Only start deleting key frames when you have tried everything else, and then only do it one frame at a time. The more key frames you delete, the more detail you will lose. The more detail you lose, the more animation you will need to do to replace it. The more animation you need to do, the more the mocap will ultimately cost.
Using the FCurves Window
The best way to refine your animation is in the FCurves window. The FCurves window allows you to view, create and modify the FCurves of the object you have selected. For example, you can adjust the value of key frames to correct poses, scale curves to change the amount of rotation on a limb or move entire curves to realign parts of the character.
- Select Object: In the Character Controls window, select the FK joint or the IK Effector you want to edit. If you select an IK effector, you must set the IK Blend value to 100.00 for the transformation property you are going to edit (e.g. if you are going to edit the Translation values of the effector, set its IK Blend T to 100.00). If you don’t active the IK Blend, the adjustments you make in the FCurves window will not appear on the character.
- Select Correct Animation Layer: In the Animation Layers window select the layer containing the key frames you want to edit (e.g. to edit the original animation, switch to BaseAnimation layer).
- Select Properties: In the Properties pane of the FCurves window, select the transformation properties you want to edit. For instance, to display and edit all the Rotation channels on an object select Rotation (Lcl). To edit each FCurve individually, select the separate X, Y or Z channel. The colour of each FCurve matches the colour for the axis they represent: Red=X, Green=Y, and Blue=Z.
- Select Key Frames: With the transformation property you want to edit selected (e.g. Translation Z) select the key frame or range of key frames you want to adjust in the FCurves pane. To select all the key frames, Right-Click in the FCurves pane and choose Select All from the pop-up menu. A range of key frames can be selected using Left-Click drag-select. Key frames can be added or removed from a selection using Ctrl-Left-Click or Spacebar-Left-Click-drag. To “focus” on the selected key frames, press f with your pointer over the FCurves pane.
- Adjust Zoom Level: Before you begin adjusting the key frames, check the values on the left side and bottom of the FCurves pane. The difference between these values will determine how big the adjustments you make to the key frames will be. For instance, to make small adjustments, zoom in so the difference between the numbers is small, say 1 or less. To make larger adjustments, zoom out so the difference is 10 or more.
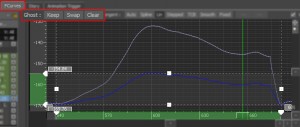
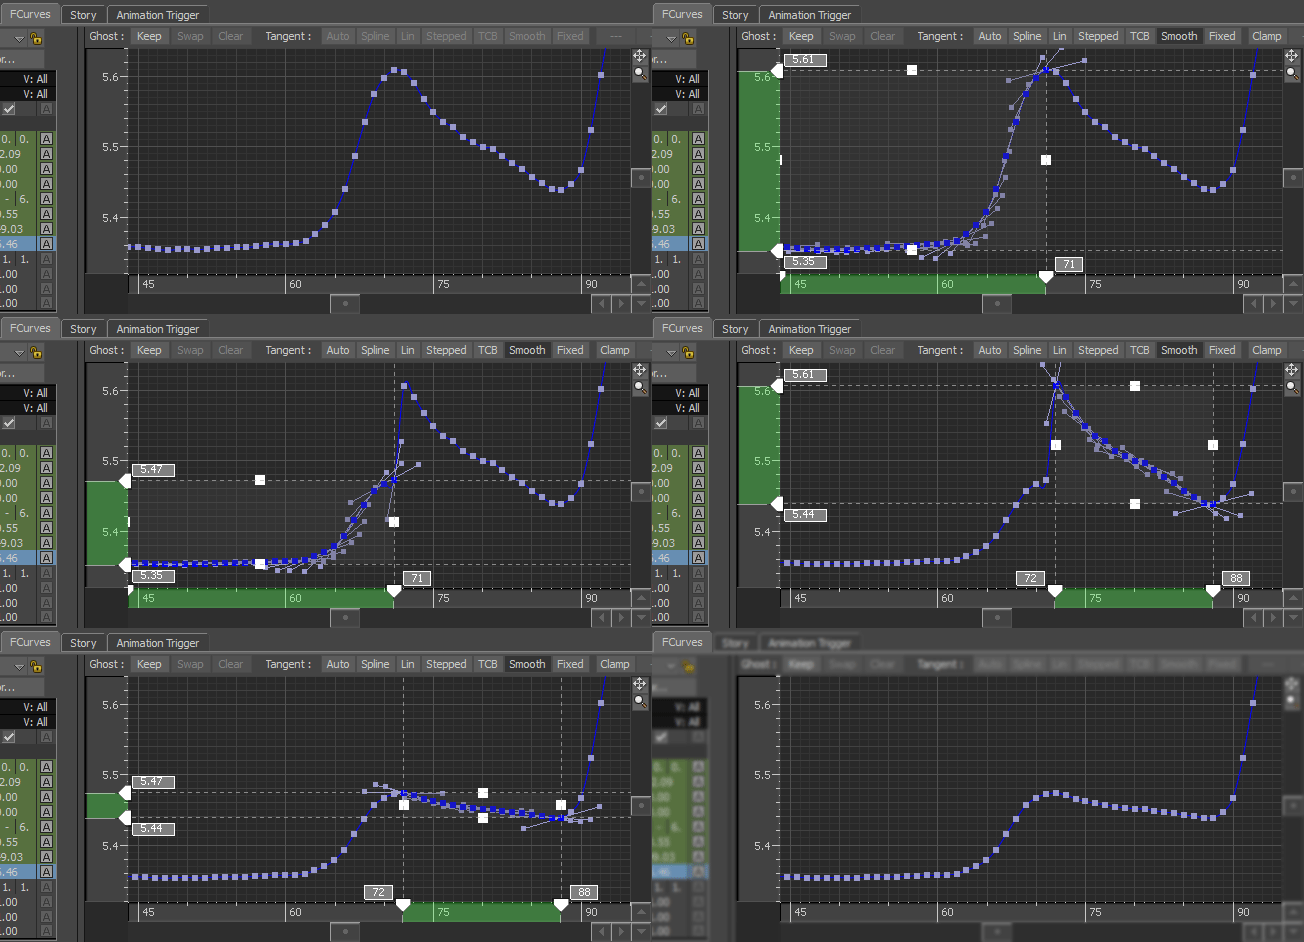
- Ghost Options: The Ghost options in the FCurves window lets you edit an FCurve while keeping the original curve as a reference. Before you begin editing, click “Keep” to take a snap-shot of the current shape of the curve. As you edit the FCurve, its original shape will be displayed in a lighter shade of the original colour. You can click “Swap” at any time to compare the results of your edit with the original mocap. When you have finished editing, make sure the curve you want to keep is active, and click “Clear” to delete the other curve (PLEASE NOTE: this will remove the lighter shaded curve).
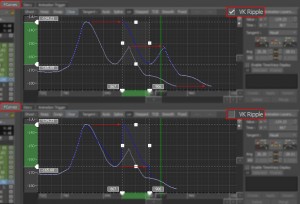
- VK Ripple: Turning VK Ripple on or off determines how moving or scaling a selection of key frames affects the other key frames on the curve. When VK Ripple is active, moving or scaling a section of key frames using the handles on the sides of the FCurves window will “push” the unselected key frames into a different position. With VK Ripple turned off, any unselected key frames will remain in their original position.
- Moving Key Frames: By adjusting a key frame’s value you can fine-tune the appearance or alignment of a character’s limb. For instance, adjust all the key frames on a single rotation axis of the character’s head so it looks forwards. The easiest way to do this is to use the single white handle or green bars that appear when you select key frames. To adjust a single key frame, Left-Click-Drag the white handle. To adjust a group of key frames, Left-Click-Drag in the centre of a green bar – you should see both handles should turn yellow as you do this. Move the key frames left and right to change their time or up and down to change their value.
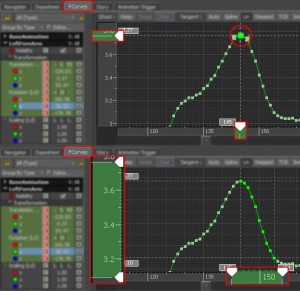
- Scaling Key Frames: Scaling the selected key frames left and right will speed up or slow down the action. Scaling them up and down will increase or reduce the amount of motion on the object – handy for reducing the amount of swing on an arm for instance. To scale a selected range of key frames, Left-Click-Drag the white handles that appear at the ends of the green bar.
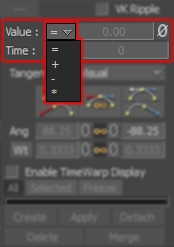
- Apply Specific Values: The Value and Time settings in the FCurves window allow you to add, subtract, multiply or apply specific values to selected key frames. This functionality can be used in a number of different ways, for example:
- To offset all the key frames on an object by 100 frames, select all the Transformation properties in the FCurve Properties pane followed by the all the key frames FCurves pane (Right-Click > Select All). Finally set “Time:” to “+ 100”.
- To remove a gimbal flip on an object, find the frame range on the Rotation axis where the flip occurs. Select the section of key frames that are flipped and set Value: to “+360” or “–360”, depending on whether the flip is positive or negative.
- To align an object to the floor, select all the Translation Y key frames and set Value: to “= 0” or use the Ø button.
Adjust Start and End Pose
Applying a Pose or adjusting the character on the first frame of the animation to create an appealing pose may create an issue on a different frame that wasn’t in the original file. For example, moving the arm closer to the body may improve the pose on the first frame but it could cause the hand to intersect with the leg on another frame. The easiest way to fix this these kinds of problems is to adjust the key frames in the FCurves window.
- Select First and Last Key: Using steps 1-5 in “Using the Fcurves Window”, select the first AND last key frames on the joint you want to edit.
- Find Error: Scrub through the animation to find the frame where the error is at its most extreme. For example, when the mesh intersection is at its deepest or the overextension at its most extreme.
- Adjust key values: With the first and last key frames still selected, Left-Click-Drag up or down in the centre of the green bar on the left side of the FCurves window until the error is removed. If the position of the character’s joints do not update as you adjust the key frames, check you have the correct IK Blend value set 100.
- Check Pose: Once you have removed the error, go back to the first or last key frame and check the both poses are still identical and that they still look good. Using the Transport Controls, scrub through the animation and check the fix hasn’t created a different issue elsewhere and that the animation still works.
Remove Overextension or IK Pulling
Pulling or overextension happens when the distance to a limb’s IK effector is greater than the length of the limb. When this happens, the IK “pulls” the limb straight, over extending it into a locked position until the distance to IK effector is reduced. This effects the natural arcing motion of the limb and also creates an unnatural looking pose.
The first thing you need to decide when removing pull is if the position of the limb or the position of the body is more important in the action. When the characters limbs are interacting with a character, prop or the environment, it’s usually best to correct the pull by moving the body towards the limb. When it isn’t necessary for the limbs to be a in a certain position, the pulling can be removed by moving the limb towards the body. With either approach, you need to be careful not to over compensate for the pull and create a permanently bent limb.
- Pin Body Parts: Before you begin trying to fix any overextension, you need to Pin the parts of the character you do not want to move. In the Character Controls window select the body parts you DO NOT want to move and Pin their Translation and Rotation (w,e). If you pin the rotation, check the adjustments you make to the rest of the character don’t cause the pinned effector to become over rotated and appear broken. If this happens, it can be easier to pin the Translation of the limb and then manually adjust the Rotation afterwards.
- Turn on IK Blend: To help keep the limb pinned in place, set the IK Blend T/R on the limb to 100.00. This also tells the Control Rig to use IK to calculate the position and interpolation of the limb when the animation is played back.
- Edit Action: Once the limbs have been pinned in place, the rest of the character can be adjusted in 2 ways: using the Translate and Rotate tools in the Viewer window or adjusting the key frames in the FCurves window. For example, to reduce the overextension or pull on a characters legs during a walk…
- …using the Translate tool: With the Hips Effector selected, set a key frame on the extreme frames of the action, the “Heel Contacts” and the “Passing Poses”. Use the Translate tool to move the hips towards the feet on these frames until the knees just begins to bend, and set a key.
- …using the Fcurves Window: Select the Hips Effector and find the frame where the pull on the legs is at its most extreme. In the FCurves window, lower the hips by scaling the key frames for Translation Y until the knees just begin to bend. Be careful not lower the hips too much or the character will have permanently bent knees.
- Using IK Pull: The Pull slider in the Character Controls widow sets how much pull an effector has on the rest of the body. The effect of the Pull depends on the IK Blend value, for example, if Pull is set to 100 but IK Blend T is set to 0, the Pull will have no effect. The pull is passed down the hierarchy of the character until the limb can reach the position of the IK effector. For example, if you set Pull on the Wrist Effectors to 100, the wrists will pull the shoulders, the shoulders will pull the chest, which will pull the hips, which in turn pull the legs. This automatic adjustment can work well when only a small amount of pull is required, but the more the rig has to “pull” and adjust the rest of the body, the more likely it will create an off-balance or unnatural looking pose or movement in the animation. To get the best results and avoid problems like this it is usually best to remove any overextension by hand.
Check the Walk Cycle
Once you’ve finished editing the animation, check it still loops and that all the errors have been fixed using all of the following methods:
- …in Front View: In the Viewer window use Ctrl+f or View > Orthographic > Producer Front to switch to front view.
- …in All Views: Switch between the other orthographic (Ctrl+r) and perspective (Ctrl+e) views to make sure the animation looks good from every angle.
- …using “In Place” Mode: In the Scene Browser, expand the Characters branch. Double-Click the character’s name to select it and open the Character Settings tab. Expand the Modifiers > In Place option and tick Lock Z. Your character should now be walking on the spot, allowing you to check the loop from every angle in the Perspective view. REMEMBER: Turn off “In Place” BEFORE you plot the animation to the character
- …at Different Speeds: Check the motion of the character at different speeds using the following methods:
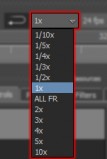
- Play Speed menu – Transport Controls > Timing Controls > Play Speed menu allows you to change the playback speed for the scene from 1/10 to 10x the original speed.
- Jog Control – Using J+Left-Click Drag left and right. This allows you to controls the playback speed interactively using the mouse as a jog control.
- Frame Step – You can also step through the animation a frame at a time using the Ctrl + ←→ (left and right arrows) on the keyboard.
Save File
Before you begin plotting the animation for export, save a version of the file – V005 for those still playing along at home.
07 Plot Animation
Once you’re happy with the walk cycle, it’s time to plot the animation from the Control Rig to your character ready for export. Depending where you want to apply the key frames, there are a couple of ways to do this:
PLOT ANIMATION ONTO THE BASEANIMATION LAYER WHEN EXPORTING
…onto Skeleton
- Open Character Settings: Double-Click the Character in Scene Browser>Characters branch and switch to the Character Setting tab.
- Plot Character… to skeleton: In the Character Settings tab click Plot Character… and select Skeleton from the Character message window. Alternatively, in the Character Controls window select Bake (Plot) > Bake (plot) To Skeleton from the Character Controls menu button.
- Set Plot Options. In the Plot Selected Properties pop-up window, set the plot options using the Suggested Settings below as a guide.
…onto Specific Objects
- Select Objects: Individual items can be selected from the Scene browser, Navigator or the Schematic View using the following methods:
- Select multiple objects using Ctrl+Left-Click, SpaceBar+Left-Click or Left-Click+Drag
- Select an object and all its children using SpaceBar+Right-Click.
- Select all the elements in a namespace using Edit>Select By Namespace, and selecting the appropriate namespace from the browser.
- Select objects with a particular name using the Find Model By Name window. In the Viewer window press Shift+n to open the pop-up. In the “Enter model name” field type the name of the objects, including namespaces and wildcards (*). For example, “*:*_skinJoints” will select all the joints ending “_skinJoints” in any namespace or “mocapMan:*jnt*” will select any object in the “mocapMan” namespace with “jnt” in the name.
- Select channels to plot: In the Key Controls window, select the correct Keying Mode for the properties you want to plot. For example, to plot just the Translation and Rotation properties on an object select TR. Alternatively, select the channels you want to plot in the FCurves window.
- Plot Selected: In the Key Controls window, select Plot Selected (Selected Properties) from the Animation menu.
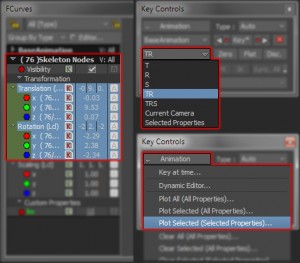
- Set Plot Options: In the Plot Selected Properties pop-up window, set the plot options using the Suggested Settings below as a guide.
…onto Custom Properties
- Select Objects: Individual items can be selected from the Scene Browser, Navigator or the Schematic View using one of the methods described above.
- Select Custom Properties to Plot: In the FCurves window, scroll down to the Custom Properties section and select the properties to plot.
- Plot Selected: In the Key Controls window, select Plot Selected (Selected Properties) from the Animation menu.
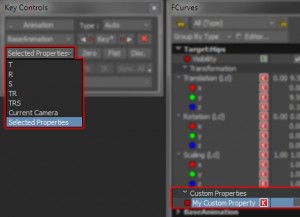
- Set Plot Options: In the Plot Selected Properties pop-up window, set the plot options using the Suggested Settings below as a guide.
Suggested Settings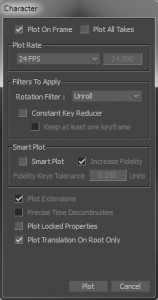
- Plot On Frame = ON
- Plot All Takes = OFF – unless there are multiple take ready to plot
- Plot Rate = Match Transport Controls>Time Format Menu
- Rotation Filter = Unroll
- Constant Key Reducer = OFF
- Smart Plot = OFF
- Plot Locked Properties = OFF
- Plot Translation On Root Only = ON
Check Plot
Once plotting is complete, check that your character still moves in the same way and the key frames have been applied correctly.
- Turn Control Rig Off: Double-Click the Character in Scene Browser>Characters branch and open to the Character Setting tab. Left-Click the tick (ü) in the Input Type:>Active box if it is still displayed.
- Play Animation: In the Transport Controls, turn on Looping and press Play. Switch between the Orthographic (Ctrl+t, Ctrl+r) and Perspective (Ctrl+e) views to make sure the animation looks correct from every angle.
- Check key frames: In the Schematic view (Ctrl+w), select any objects that should have key frames. In the FCurves window select the Translation, Rotation or Custom Properties channels. If the objects have key frames on them, they will be appear in the FCurves pane.
If the plot has not been successful, DO NOT REPLOT the animation back to the Control Rig. This will plot all the edits you’ve made on to the BaseAnimation layer, making it impossible for you to adjust them again. Instead, Re-activate the Control Rig in the Character Settings tab and try repeating the steps in the Plot Animation section.
DO NOT REPLOT ANIMATION TO THE CONTROL RIG
Save File
Save a final “Edit” version of the file ready for importing back into your software of choice. This will also be the version of the file you can return to if you need to make any adjustments. Just open the file and reactivate the Control Rig to see your original edits.
- Save the File: From the File menu select Save As… and use the Save File browser to navigate to a location you want to save the file.
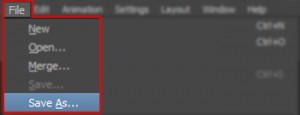
- Set the File Name: Update the Version number at the end of the file name – this will be V006 if you’re still playing along at home – or give the file a new name. Don’t be tempted to use “_FINAL_” in the name as it very rarely is and you’ll end up with “_FINAL_FINAL_V010” and so on.
- Save Everything: In the Save Options window, Save All Elements, Save All Animation, Save All Settings, tick all the Takes and click Save.

08 Clean Up
The following section will show you how to create a “clean” version the file. While this isn’t an essential step, it will help improve compatibility when importing the files into other software.
Rename Take
- Select Take: In the Navigator window, double-click the Takes branch to expand it and open the Take settings window.
- Rename the Take: Right-Click the Take Name in the Navigator window and select Rename from the pop-up menu or Double-Click the Take Name in Takes settings window. Type a new name for the take and Hit Enter to confirm.
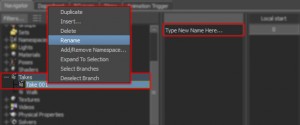
Delete Take 001
- If Take 001 doesn’t contain any animation, Right-Click it in the Navigator window and select Delete from the pop-up menu.
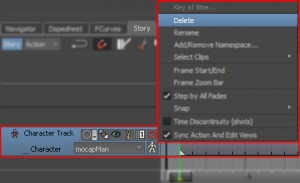
Delete Character Animation Track
- …using pop-up Menu: In the Story window, Right-Click the Character Animation Track and select Delete from the pop-up menu.
- …using the Keyboard: In the Story window, Left-Click the Character Animation Track to select it and press Delete on the keyboard.
Delete Poses
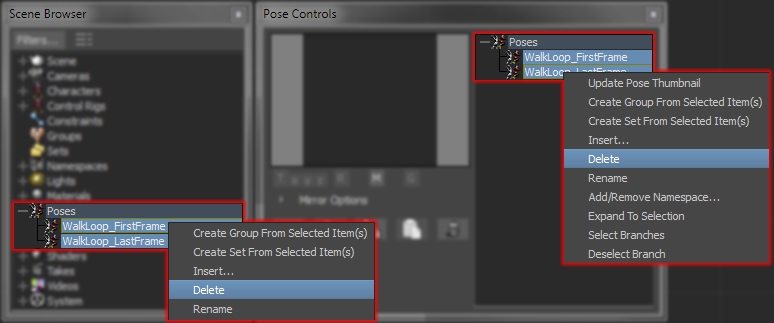
- Select all the Poses: In the Pose Controls or Scene Browser window, expand the Poses branch and select all the poses using Shift+Left-Click or Ctrl+Left-Click. Alternatively, Right-Click the top of the Poses branch and choose Select Branches from the pop-up menu.
- Delete Poses: Right-Click over one of the poses and select Delete from the pop-up menu. Please Note: If you use the Select Branches method you will get a warning saying “One or more of the objects cannot be deleted”. This is because the Poses object gets selected along with the branches and cannot be deleted. You can ok the warning.
Delete Control Rig
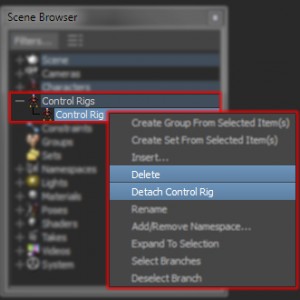
- Detach Control Rig: In the Scene Browser, expand the Control Rigs branch. Right-Click the character’s Control Rig and select Detach Control Rig from the pop-up menu.
- Delete Control Rig: In the Scene Browser, Right-Click the Control Rig again and this time select Delete from the pop-up menu.
Rescale Character
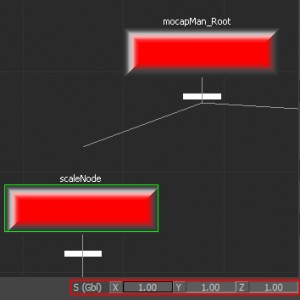
- Select Scale Node: In the Schematic View select the node used to scale the character.
- Check for Key Frames: Select the Scale channel in the FCurves window and check there are no key frames on it.
- Rescale to 1: In the Properties tab or Global/Local fields in Viewer window, type the original scale value for the character, for example 1. Play the animation to make sure the rescale has worked.
Remove Namespace
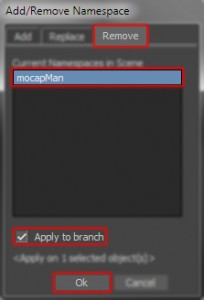
- Select Character’s Namespace: From the Edit menu choose Select By Namespace… and click the character’s namespaces in the Select By Namespace window. Click Select branch and then Ok.
- Remove Namespace: From the Edit menu select Add/Remove Namespace… In the Remove tab of the Add/Remove Namespace window, select the character’s namespace, click Apply to branch followed by Ok.
Save File
- Save the File: From the File menu select Save As… and use the Save File browser to navigate to a location you want to save the file.
- Set the File Name: Update the Version number at the end of the file name or give the file a new name. For example, use “_CLEAN_V001” instead of “_EDIT_V007”. Don’t be tempted to use “_FINAL_” as it very rarely is and you’ll end up with “_FINAL_FINAL_V010” and so on.
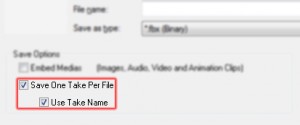
- Use Take Name: You can also use the take name to name your file. Type anything in the File name field (MotionBuilder will not allow you leave this blank) and select Save One Take Per File and Use Take Name. If you do not select Use Take Name, MotionBuilder will rename the file to <FILE_NAME> – <TAKE_NAME>.fbx.
- Save Everything: Unless there is an element in the file you do not want to save, make sure all the assets are selected (Scene Elements, Animation, Settings and Takes). Click Save.

Now you have all the information you need…
- Head over to Autodesk® Character Generator and create a character
- Download a motion capture Walk file FOR FREE from the Carnegie Mellon University Motion Capture Database
- And come back and tell us how you got on in the comments section!
Leave a Reply