Adding a Live Shadow to a scene is a simple process which can help ground a character without the need for an environment. The live shadow can be added to an existing scene to make renders a little more interesting or to a scene ready for editing or using during a live motion capture session to help ground the character.
The main steps to creating the show are
- Create an Infinite Light
- Create a Floor plane
- Create a Live Shadow Shader
- Create a Shadow Group
Create an Infinite Light
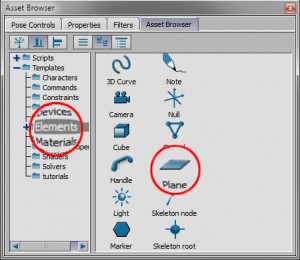
- Add a light in to the scene. In the Asset Browser>>Elements folder drag a “Light” object in to the Viewer window.
- Position the Light. Set the position of the light by moving it above your character or typing values in to the viewer window. Something like 0,1000,0 can be used for the Y translation as long as it is higher than your character.
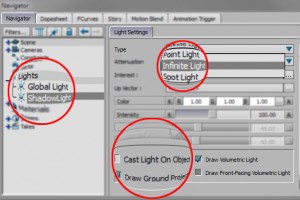
- Change to Infinite Light. In the Navigator window go to the Navigator tab and expand Lights. Double click the light you’ve just created and change it’s Type to Infinite Light from the drop down menu.
- Turn off Cast Light On Object. In the same window un-tick the Cast Light On Object tick box.
- Rename to “ShadowLight”. Right click the object in the viewer or in the Navigator and Rename the light to “ShadowLight”
Create a Floor Plane
- Add a Plane in to the scene. In the Asset Browser/Elements folder drag a “Plane” object in to the Viewer window. This will act as the floor for the scene
- Position the Floor Plane. Position the plane at the required floor level under your character.
- Scale the Plane. Scale the floor plane so the character remains over it during the animation. If you don’t know where the character is going to be in the scene, try a large number for the scale value.
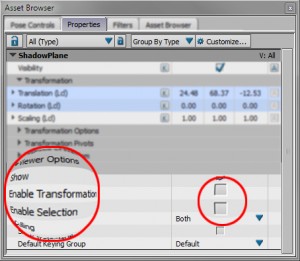
- Disable Transformation and Selection. Under Asset Browser>>Properties>>Viewer Options turn off Enable Transformation and Enable Selection to prevent accidentally selecting or moving the Plan when working with the scene. The Shadow Plane can still be selected in the Schematic View or Navigator under Scene objects.
Create a Live Shadow Shader
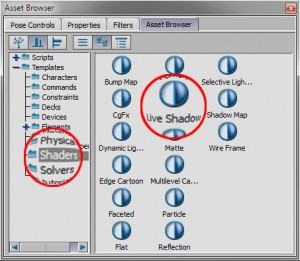
- Add a Live Shadow Shader to the Floor Plane. In the Asset Browser>>Shaders folder drag a “Live Shadow” shader on to the plane.
- Replace All. From the pop-up menu choose Replace All to replace any shaders already assigned to the plane. You should see the floor plane disappear and a shadow appear under your character.
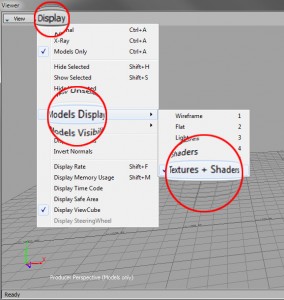
- Set Display Mode to Texture and Shaders. If you can still see the floor plane make sure the Viewer>>Display>>Model Display is set to Textures + Shaders.
- Rename Shader to “LiveShadow”. Right click the object in the viewer or in the Navigator and Rename the light to “Live Shadow”
Create a Shadow Group
- Add objects to a group. Select the Floor Plane, Shadow Light and Shadow Shader and click Create in the Group window.
- Rename Group. Double click the name of the group and change the name to something more recognisable like “Shadow”.
- Prevent selection. In the Group window un-tick the Pick column to stop accidental selection of the objects in the Viewer.

I like to thank you for this great tutorials about mocap and motionbuilder.
Very useful
José