This tutorial will explain how to use the MotionBuilder Story Tool to create an animated cut-scenes or pre-vis sequences. I will guide you through every step of the process from importing your characters and environment into MotionBuilder and animating them using the Story Tool to plotting and saving the finished animation.
The Story Tool allows you to create complex animated sequences using multiple characters and motion capture clips and then reposition, edit and blend them, in a similar way to video editing software.
There’s also a video tutorial showing “How to Use MotionBuilder Story Tool to Create a Cut Scene”.
Prepare Environment Geometry
I’ve tried to make the following steps as non-software specific as possible so they apply to any 3D package. This may mean you’ll need to do a little digging around to find the correct menu or object name in your 3D program.
Exporting Geometry to MotionBuilder
- Combine the geometry into a single mesh. Before exporting your environment geometry to MotionBuilder, combine the individual geometry objects into a single mesh to help improve the performance of the scene in MotionBuilder. Be careful not to combine any geometry you may want to reposition once inside MotionBuilder.
- Group the environment geometry. Parent any individual environment objects under a single locator so they can be easily positioned and rescaled inside MotionBuilder. Rename the locator to something more appropriate so its easily identifiable in the scene.
- Export scene. Using the fbx plugin exporter, export the entire scene to MotionBuilder using File>Export All… or select and export specific objects using File>Export Selection…
- Set export options. In most instances the standard export presets “Autodesk Media & Entertainment” and “Autodesk MotionBuilder” will work for exporting files to MotionBuilder. If you are only exporting geometry it may help to turn off Animation, Cameras and Lights in the File Type Specific Options>Include drop downs.
- Embed Media on export. This will “embed” all the textures in the scene into a fbm folder with the same name and export path as the exported Geometry. This option should only be necessary if the exported FBX file will NOT be used on your local machine, requiring the paths to the textured to change. To use this option, turn on File Type Specific Options>Include>Embed Media>Embed Media in the FBX exporter window.
Importing Geometry into MotionBuilder
Next we’ll look at how to get the geometry you’ve exported into MotionBuilder and set it up in a way that makes it easier to work with and manage.
- Start a New Scene. Begin by opening a new session of MotionBuilder or start a new scene using File>New.
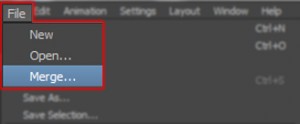
- Open the environment geometry. The exported environment geometry can be opened as a new scene or merged into an existing MotionBuilder scene. The Open/Merge Option window (described below) allows you to specify exactly what is included in the file. To open the file as a new scene use File>Open… or to merge the geometry into an existing scene use File>Merge…
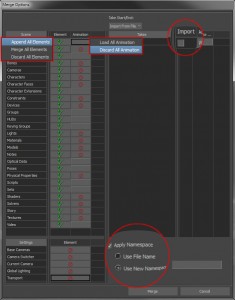
- Select elements to include. Using the Open/Merge Options window allows you to specify which scene elements and animation data will be loaded. Any elements you don’t want to include can be discarded by left-clicking in the Element column next to the item you want to discard until a red circle with a line through appears. To remove any animation from the file, right-click in the Animation column and select Discard All Animation from the menu or individual takes can be omitted by left-clicking the tick in the Import column next to the take.
Parent geometry to a null
If the environment geometry wasn’t parented under a locator before it was exported, this can be done inside MotionBuilder. Parenting the environment objects under a Null will allow you to easily position and scale them in the scene
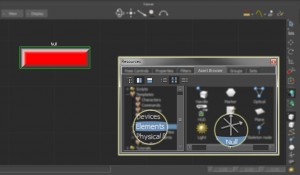
- Create Null object. To create a Null object in the centre of the scene, switch to Schematic view (Ctrl+w) and drag a Null object from the Asset Browser in to the Viewer close to the objects you are going to parent to it. Alternatively drag a Null object from the “Asset Browser” into the Perspective view and position it in the scene it using the manipulators.
 Parent the geometry to the Null. Select all the objects you want to parent under the Null object. In Schematic view, press “p” to switch to parenting mode and LMB drag from one of the objects to the Null object (you should see white dotted lines appear from each selected objects to the cursor) and release. Alternatively, in the Schematic or Perspective window Alt-left-click and drag the objects to the Null (you should see a small context menu icon appear beside the cursor) and select Parent from the pop-up menu.
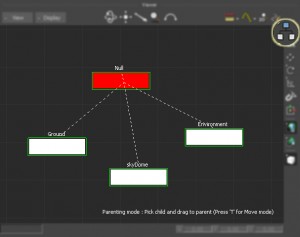
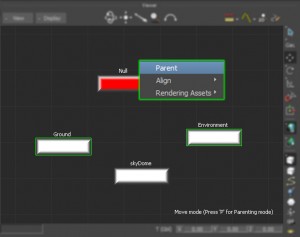
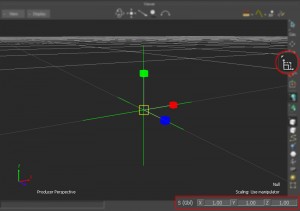
- Rescale the null. The null object can now be used to scale the environment geometry to the correct size, while maintaining the distance between the objects. Select the Null, switch to Scale mode (s) and type the appropriate scale value in the input panel in the lower right corner of the Viewer or use the scale manipulator in the Perspective viewport.
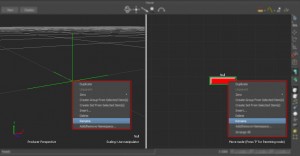
- Rename the Null. To make it easy to identify what the null is and keep things organised, rename the null object to something more appropriate. Right click the Null object in the Schematic or Perspective view and select Rename from the pop-up menu.
Assign objects to “Groups” or “Sets”
Groups and Sets work in a similar way, however; object can only be only be assigned to a single “Set” while “Groups” allow single objects to be assigned multiple groups. Adding the environment geometry to a “Group” or “Set” allows you to easily hide and display them and also prevent them being accidentally selected or moved while you’re working on the scene.
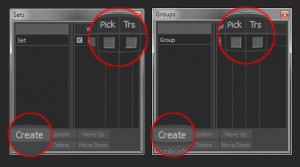
- Create a Group or Set. Select the objects you want to assign to a Group or Set in the Scene browser or Viewer window and click “Create” in the Groups or Sets window.
- Rename. Rename the Group or Set in the Navigator window using the right-click menu or by double clicking the name of the Group or Set in the relevant window.
- Set object options. Once the objects have been assigned to a “Group” or “Set”, set their ability to be viewed (Show/Vis) selected (Pick) and translated (Trs). Turn off “Pick” and “Trs” to prevent accidental selection of movement of the environment.
- Updating. The content of Groups and Sets can be updated by selecting or deselecting the objects and clicking Update in the Group/Set window or by expanding the Groups or Sets in the Scene browser window and right-clicking on the object to remove and selecting “Detach.
Character Set-Up
The following steps detail some best practices for preparing characters for use in MotionBuilder. Although you’re probably ready to skip this part already and get straight into animating, it is worth spending a bit of time now to avoid problems later.
Creating a Clean Character File
Before you begin merging characters into your scene, it’s a good idea to spend a bit of time preparing them so they are easier to work with and to avoid issues like naming conflicts.
- Rename the Character. Ideally all your characters will have unique names that can be used for the “Character” name so they can be easily identified in the scene. To rename a MotionBuilder “Character” right-click the character in the scene browser window and select Rename from the pop-up window.
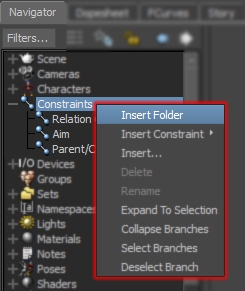
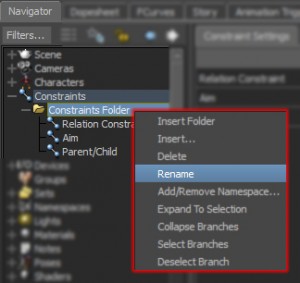
- Add items to folders. Folders allow you to group multiple items of the same type, like constraints, in the navigator. Grouping item in folders will make them much easier to work with when you start building large complex scene with multiple characters. In the Scene Browser window, right-click the type of asset you want to add the folder to and select Insert Folder from the pop-up menu. Select the items you want to add to the folder and drag them onto the folder. Finally, rename the folder.
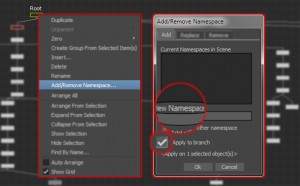
- Add items to namespace. To avoid naming conflict and help with selection, it’s a good idea to namespace a character and all the elements associated with it using the same name as the “Character” name above. Select all the objects to namespace in the Asset Browser and Schematic view. Right-click one of the selected items and select Add/Remove Namespace… from the menu. In the Add tab of the Add/Remove Namespace window, type in the New Namespace and click “Apply to branch” followed by OK.
- Merging multiple version of the same character. If you need to merge multiple version of the same character into a scene, always create unique versions of the character in a separate file first, using the methods described above.
Merging Characters into MotionBuilder
- Merge a character. Begin by merging a clean version of the character into the scene. From the File menu select Merge… and navigate to the file you want to merge.

- Set Merge options. If a “clean” version of the file isn’t available, the Merge Options dialogue box allows you to decide which elements are merged, appended or discarded during the merge operation.
- Append All Elements. In the Elements column, the merge options for individual elements can be set using left-click or the merge options for all the elements can be set using right-click. Unless there is an element you know you don’t want, right-click and select “Append All Elements” from the menu.
- Discard All Animation. If the elements being merged contain animation data, it is possible to specify if this will be merged in the same way as an Element, by clicking in the Animation column. Unless you are using a file that contains animation you want to use in the scene; right-click and select “Discard All Animation” from the menu.
- Deselect All Takes. Unless you are using a clean file that contains no animation data or you are using a file that contains animation you want to use, it is best NOT to import any takes. Left-click the Import title at the top of the Import column to deselect any takes in the file.
- Apply Namespace. MotionBuilder will resolve any naming conflicts that occur during the merge by adding a “ 1” to the end of the name of the asset. This renaming will mean the characters elements no longer have the same name which will prevent any animation created with this renamed rig import correctly. If the elements in the file being merged haven’t been namespaced, it is possible to do this during the merge. Left-click “Apply Namespace” and select “Use File Name” to use the name of the name of the file being merged or select “Use New Namespace” to enter your own.

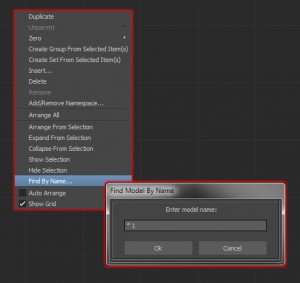
- Check the merge was successful. Once the file has been merged, check all the elements were merged correctly and there were no naming conflicts. To check if any objects were renamed with the “ 1” suffix, switch to the Schematic view and right-click in the Viewer window and select Find By Name… Type “* 1” in the Find Model By Name dialogue box – assuming you don’t have any objects in your scene that should end in “ 1”.The same workflow described above can also be used used at this point to create a “clean” version of the merged character.
Animating characters using the Story Tool
Adding Characters to Story Tool
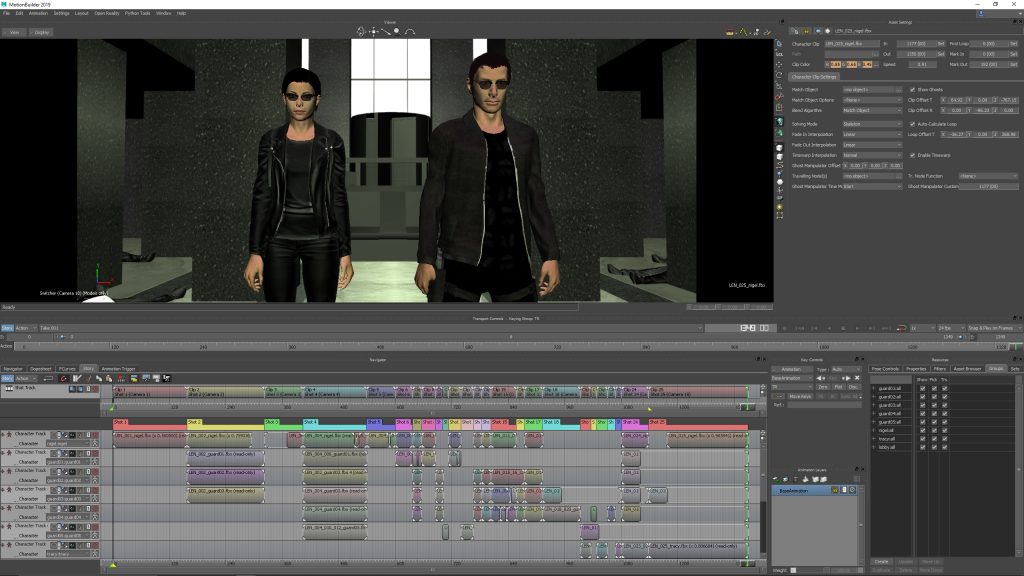
To begin animating a character using the Story Tool, the character needs to be assigned to it using a Character Animation Track. The Character Animation Track allows you to assign animation to the character and assemble the clips along a timeline, like a non-linear editor.
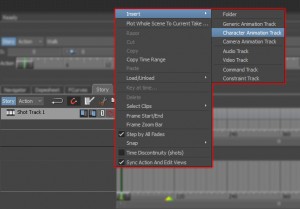
- Create a Character Animation Track. In the Story window right-click in the Action Timeline and select Insert>Character Animation Track from the pop-up menu.
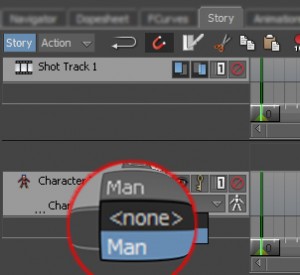
- Assign the character to the Story track. In the Character Animation Track, select the character’s name from the “Character” drop-down menu.
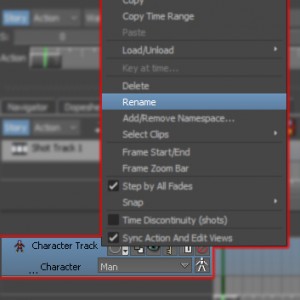
- Rename the track. To make it easy to identify which character the character Track affects, rename the track to the same name as the character. Right-click the Character animation Track and select Rename from the pop-up menu.
Inserting Animation in Story Tool
An animation file containing keyframes plotted to any characterized skeleton can be inserted into the Character Track. If the inserted file was created using a different character, MotionBuilder will retarget the animation but this may cause retargeting artefacts. The inserted animation data cannot be mapped to a character’s Reference Node, as this cannot be accessed by the Story Tool. The animation would need to be transferred to the character’s “Hips” and remapped back the Reference Node as a post process.
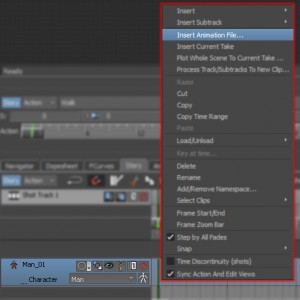
- Insert an animation file. In the Story tool window, right-click over the frame in the action timeline where you want the file to be inserted (MotionBuilder will align the first frame of the file with the cursor when you right-click). From the pop-up menu select Insert Animation File… and navigate to the file you want to import and click “Open”. This will import a read only version of the file.
- Check playback. Once the file has loaded, check it plays back correctly on the character. Turn on Story mode in the Navigator or Story window and scrub the time slider at the bottom of the story tool window to view the clip. This method allows you to view the animation without setting the playback range. If you do want the Frame the animation, use the method described below.
Editing Clips in Story Tool
A motion capture clip may contain additional data that isn’t required in the final scene. For technical or safety reason the performer may not have been able to start the action in the correct pose or the action may have been captured at a slightly different speed. The clip may have been edited to loop continuously or require reusing multiple times during the scene.
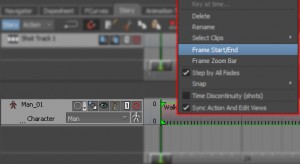
- Framing the clip. To view the animation using the playback controls in the Transport Controls window, you will need to set the Start and End values for the take. To frame every clip in the timeline; make sure all or none of the clips are selected, right-click in the Story track and select Frame Start/End from the pop-up menu. To frame specific clips; repeat the process with the required clips selected. The same processes can be used to frame the Zoom Bar by selecting Frame Zoom Bar from the right-click menu instead of Frame Start/End.
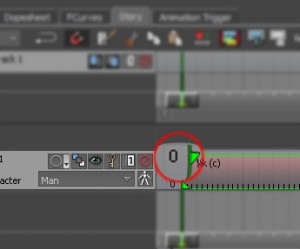
- Changing the start position. The values displayed next to the top corners of a selected clip represent the Global start and end values of the clip in the current take. The position of a clip in the timeline can be altered to synchronise an event in the animation with an event in the scene or to sequence the playback of multiple clips. To type a specific start value for the clip, double-click the number next to the top left corner of the clip and type in the required start value. To move a clip into the correct position in the timeline, left-click the middle of the clip and drag it to the left or right. Multiple clips can also be selected and positioned in this way.
- Trimming a clip. The values displayed next to the bottom corners of a selected clip represent the Local start and end values of the original file. Any unwanted animation can be removed from the start and end of the clip in a non-destructive way by changing these values. To trim the start or end frames from a clip, set Loop/Scale Clip to Loop and position the cursor over the beginning or end of the track until it changes to a double ended arrow. Left-click drag the edge of the clip to the desired value. Alternatively, double-click the local value you want to change and type the required value into the field.
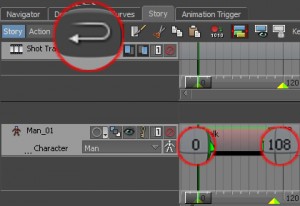
- Looping a clip. Animations that have been designed and edited to loop when played back, such as a walk, can be inserted into the Story tool to create a continuous action. Set Loop/Scale Clip to Loop and position the cursor over the beginning or end of the track until it changes to a double ended arrow. Left-click drag the edge of the clip to create the required number of loops or until the clip is the desired length. As you drag the edge of the clip, a line should appear representing the position of the loops in the clip.
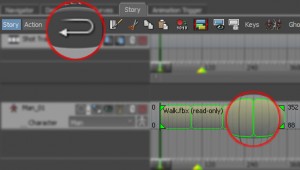
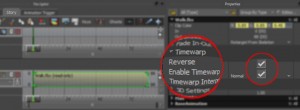
- Reversing a clip. The animation in a clip can be easily reversed using the properties of the clip. Select the clip containing the animation to reverse. In Properties>Timewarp make sure Enable Timewarp is active and click Reverse.
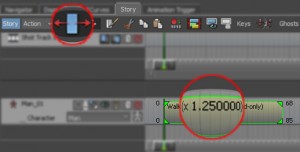
- Clip playback speed. The playback speed of the clip can be increased or decreased using the scale tool. Set Loop/Scale Clip to Scale and position the cursor over the beginning or end of the track until it changes to a double ended arrow. Left-click drag the edge of the clip until the scale value displayed in the clip is correct or the speed of the action looks correct when played back.
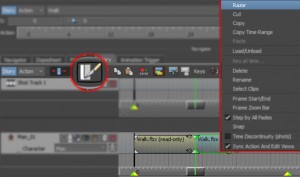
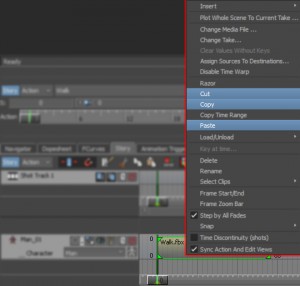
- Razor clips. A clip can be cut using the Razor tool, allowing either part of the clip to be edited independently of the other. Move the time cursor to the frame where you want to make the cut. In the Story window click the Razor button or right-click in the Story track and select Razor from the menu.
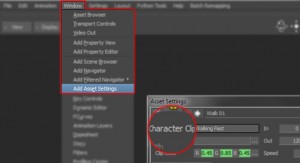
- Renaming clips. If you have Razored a clip or the names don’t really reflect what’s happening in the clip, you can rename it to something more appropriate. Select the clip you want to rename in the Story tool and open an Asset Settings window from Window>Add Asset Settings. Click the text in Asset Settings>Character Clip to select it and type a new name.
- Cut, Copy and Paste clips. The standard Cut, Copy and Paste commands can be used on selected clips to duplicate and reuse them or remove them from the timeline completely. Select a clip in the Story window and right-click and select Cut, Copy or Paste from the menu, or use the keyboard shortcuts Ctrl+x, Ctrl+c and Ctrl+v.
Realigning Clips in Story Tool
Motion capture is often performed in the centre of a capture volume or facing in a particular direction, because of the constraints of the system. In these instances, the action will need to be re-positioned and aligned using the Story tool.
- Turn on Ghosts. To allow you to reposition a character using the story clip, you need to show the “Ghosts” for the track. In the Character Track turn on Show/Hide Ghosts and switch to X-Ray or Normal View (Ctrl+a) to make them visible in the Viewer window. The “Ghosts” are stick-figure representations of the start and end poses of the character, joined by a straight line. By default the “Ghosts” are displayed based on the position of the time cursor, which may mean the stick-figure is displayed under your character skeleton. To make the ghosts always visible, select the clip and in Properties>Ghosts>Show Ghosts Mode menu select “Always” from the drop down menu.
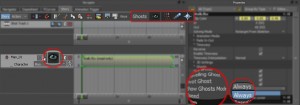
- Deselect everything. If you have an object selected the position values displayed for the clip will be relative to that object rather than the root of the clip, which can make it difficult to align the clip accurately. To deselect everything, double click in an empty area of the Viewer window.
- Position the clip. Scrub to the frame of the animation that requires aligning so the character is in the correct pose. In the character track, left-click the clip or clips you want to reposition (the border of the clip should change to green) Using the manipulators in the Viewer window, translate (t) or rotate (r) the character/clip into the correct position. The X, Y, Z Global/Local fields in the bottom right corner of the Viewer window can also be used to reposition the clip by typing specific values or left and right-click dragging in them.
Blending Clips in Story Tool
Some actions may need to be captured separately due to their complexity or because of the available space in the capture volume. Individual takes like these can be recombined into a single action using the Story Tool.
- Insert the takes. Insert each of the separate takes into the Character Track and arrange them in the correct order.
- Match start and end poses. Remove the necessary frames from each animation clip so the character’s end pose in the first clip matches as closely as possible to the character’s start pose in second. The closer the two poses match, the better the action will blend and the less editing will be required.
- Set Ghosts to always visible. Setting the ghosts for each track to always visible will display a stick-figure representation of the start and end positions of the character for each track. These figures can then be used as a guide when aligning the clips together. In the Character Track turn on Show/Hide Ghosts and switch to X-Ray or Normal View (Ctrl+a) to make them visible in the Viewer window. With the clips selected, select “Always” from the drop down menu in Properties>Ghosts>Show Ghosts Mode
- Position the first clip. In the character track, left-click the first clip you want to position (the border of the clip should change to green) Using the manipulators in the Viewer window, translate (t) or rotate (r) the character/clip into the correct position. The X, Y, Z Global/Local fields in the bottom right corner of the Viewer window can also be used to reposition the clip by typing specific values or left and right-click dragging in them.
- Align the second clip using Match Object. The fastest way to align two clips in Story is to use the Match Object tool. To get the best results possible from the tool, the two clips you are matching should ideally contain poses that are as similar as possible or contain a joint that remains static during the blend (the “contact” foot on the floor in a walk for instance). In the Story clip track, select the clip you want to realign or select a joint in the ghost character you want to use to align the clips. Open the “Match Options…” dialogue box. If you didn’t select a skeleton joint to align the clips, from the “Match Object” drop down menu select the character joint you want to use to align the clip. “Match Clip” “To Previous Clip”. “Match Time” “At Start of Selected Clip”. “Match Position” in “Translation” and “Rotation” and click OK.
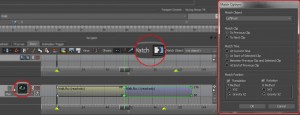
- Align the second clip by hand. In the character track, left-click the second clip in the timeline to select it. Using the same method you used to position the first clip, align the starting position ghost of the second track to the end position ghost of the first track. Try to align the clips using a joint needs to remain static during the blend (the “contact” foot on the floor in a walk for instance) Use the front and side orthographic views to zoom in to check the alignment of the clips and make fine adjustments.
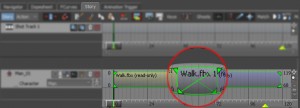
- Blend clips. Once the clips have been aligned a simple cross blend can be created between the two clips by overlapping them in the clip track
Plotting Animation In MotionBuilder
Creating New Takes
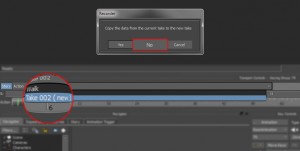
- Create a new take. To avoid losing any of the animation data in the take in your scene it’s a good idea to create a new take to plot your Story animation to. In the Transport Controls, select “Take 002 (new)” from the Current Take drop-down menu and choose “No” from the “Copy the data from the current take to the new take” pop-up menu.
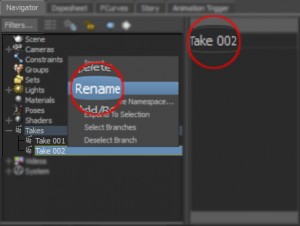
- Rename take. In the Navigator>Scene Browser>Takes> Right-click>Rename the take name or double click Takes and left-click the take name to change it to something more suitable.
- Frame the clip. Before plotting the animation to the new take, you will need to set the correct frame range for the animation. Select all or none of the clips in the Story track. Right-click in the Story track and select Frame Start/End from the pop-up menu. To frame only specific clips, repeat the process with the required clips selected.
Plotting Whole Scene to Current Take
The simplest way to plot the animation for all the elements in Story track is to use the right-click “Plot Whole Scene to current take” option. This will plot the relevant animation to any objects you have in the Story track.
Plotting Animation to Specific Objects
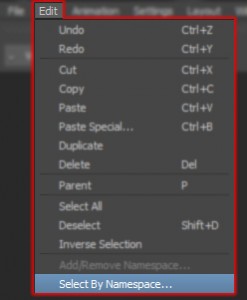
- Select Objects to Plot. If the elements you want to plot use the same namespace, they can easily be selected using Edit>Select By Namespace… and selecting the appropriate namespace from the browser. Items can also be selected from the Scene browser or Navigator window and in the Schematic view using Ctrl+Left-click, SpaceBar+Left-click/click-drag or SpaceBar+Right-click. With all the objects selected, this may also be a good point to remove the namespace from the objects if they are no longer required.
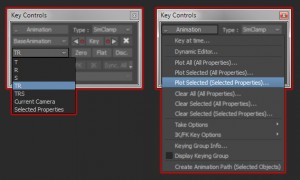
- Select channel to plot. To plot animation to specific channels on the objects you have selected, set the Keying Mode in Key Controls to the correct mode (e.g. TR for Translation and Rotation) or select the channels the FCurve window. Using the FCruve window will also allow you to select custom properties that may also require plotting.
- Plot Selected. Once you have specified what channels to plot, select Plot Selected (Selected Properties)… from the Key Controls>Animation menu.
- Set Plot Options. Set the plot options in the pop-up window using description below as a guide.
Plotting Animation to a Character
Once you are happy with the position and animation of the character, plot the animation to the character in the current take.
- Plot to Control Rig. If the action requires further editing, the animation can be plotted to the control rig. From Scene Browser>Characters>”Character”>Character Settings click Plot Character…. From the Character message window Bake animation from Character to… Control Rig. Alternatively you can use Character Controls>Bake(Plot) Bake (plot) To Control Rig.
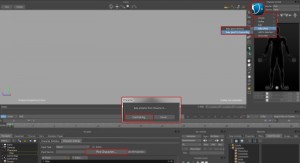
- Plot to Skeleton. If the action doesn’t requires any further editing, the animation can be plotted directly to the skeleton. From Scene Browser>Characters>”Character”>Character Settings set Input Type to Control Rig and click Active. With the control rig active, click Plot Character…. and select Skeleton from the Character message window. Alternatively, set the required character in Character Controls and set Source to Control Rig From the Character menu select Bake(Plot) Bake (plot) To Skeleton.
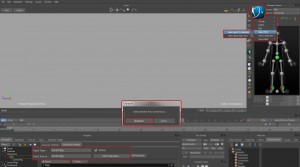
- Set Plot Options. Set the plot options in the pop-up window using description below as a guide.
MotionBuilder “Plot Properties” Window Explained
- Plot On Frame. To ensure keys aren’t plotted on sub-frames use “Plot On Frame” to plot the animation based on the specified “Plot Rate”.
- Plot current take. When using Story you only need to plot the animation to the current take you have set otherwise the animation in Story will be plotted to all the takes in your scene. To do this, leave Plot All Takes un-checked.
- Set frame rate. The Plot Rate menu lets you specify what frame rate to use when plotting the animation in Frames Per Second (FPS). From the drop down menu select your required FPS or use “User FPS” to input your own.
- Set Rotation Filter. The Rotation Filter menu lets you to select a filtering option for rotation animation when plotting the animation to an object.
- None – Will not apply any filtering to curves.
- Gimbal Killer – Tries to compensate for gimbal flipping/locking by adding additional sub-keyframes to the animation curves.
- Unroll – Will “unroll” the Euler rotations, making the curves continuous
- Set Constant Key Reducer – helps reduces the number of keyframes by removing keyframes that have the same value e.g. when the object is static. Keep at least one keyframe will leave at least one keyframe on the curve when removing keys with the same value.
- Smart Plot – is more relevant when merging animation layer in MotionBuilder. It allows you plot animation without creating extra keyframes so you can continue to edit your original keyframe animation.
- Plot Extensions – plots the animation on all Character Extensions along with the rest of the character’s animation.
- Plot Translation on Root Only – if you’re plotting to a character, this will only plot translation keys to the “Hips” of the character.
Check the animation has been plotted properly by turning off Story mode and playing the animation. If the animation hasn’t plotted correctly you can turn Story mode and any necessary character rigs back on and re-plot the animation.
Saving A File
Save Entire Scene
When the animation clips have been plotted from Story and all the editing is complete, the entire scene can be saved as a single file.
- Name the file. In the File>Save As… window, navigate to the folder where you want to save the file and type in a file name.
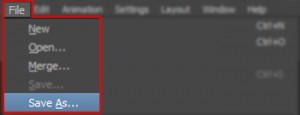
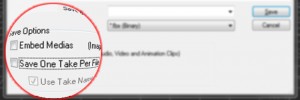
- Turn off Embed Media. Embed Medias will create a .fbm folder containing any textures or other media associated with the file in the same location. This isn’t usually necessary unless you’re planning to transfer the MotionBuilder file to another machine with different file paths.
- Turn off Save One Take Per File. Save One Take Per File and Use Take Name will save a separate file for each take in your scene, using the take name as the file name. Unless you’ve created multiple takes in your scene you want save into separate files, you can turn this off. Doing this will also disable the Use Take Name option.
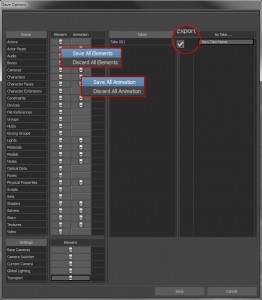
- Set Save options. On clicking Save, the next window you will see is the Save Options window. This window allows you to specify which Elements and Takes are saved with the file. Unless there are Elements or Takes you really don’t want to save in the final file, set all the elements to save. In the Element column, right-click and select Save All Elements and in the Animation column, right-click and select Save All Animation. If you want to discard an element or it’s animation, Left-click in the Element or Animation column next to the item until a red circle with a line through appears.
- Select Takes to save. All the takes in the file are displayed on the right side of the Save Options window. To save all the takes in the file, make sure they have a tick next to them in the Export column. Any un-ticked takes will be discarded. You can also rename any take using the As Take… column by double-clicking the current take name and replacing it with a new one.
- Click Save. And you’re done!
Saving Individual Character Files
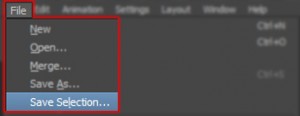
It is also possible to save each character in the scene into an individual FBX file using File>Save Selection…
- Select elements to save. If the character and any associated elements use the same namespace, they can easily be selected using Edit>Select By Namespace… and selecting the appropriate namespace from the browser. Items can also be selected from the Scene browser or Navigator window and in the Schematic view using Ctrl+Left-click, SpaceBar+Left-click/click-drag or SpaceBar+Right-click. With all the objects selected, this may also be a good point to remove the namespace from the objects if they are no longer required.

- Save selected. Using the File>Save Selection… window, navigate to the folder where you want to save the file and type in a new file name.
- Turn off Embed Media. Embed Medias will create a .fbm folder containing any textures or other media associated with the file in the same location. This isn’t usually necessary unless you’re planning to transfer the MotionBuilder file to another machine with different file paths.
- Turn off Save One Take Per File. Save One Take Per File and Use Take Name will save a separate file for each take in your scene, using the take name as the file name. If you want to use this option when exporting multiple characters, you will need to save the separated takes into a different folders or change the name of the takes in the Save Option window otherwise Motionbuilder will overwrite the files with each save.

- Set Save options. On clicking Save, the next window you will see is the Save Options window. This window allows you to specify which Elements and Takes are saved with the file. Unless there are Elements or Takes you really don’t want to save in the final file, set all the elements to save. In the Element column, right-click and select Save All Elements and in the Animation column, right-click and select Save All Animation. If you want to discard an element or it’s animation, Left-click in the Element or Animation column next to the item until a red circle with a line through appears.
- Select Takes to save. All the takes in the file are displayed on the right side of the Save Options window. To save all the takes in the file, make sure they have a tick next to them in the Export column. Any un-ticked takes will be discarded. You can also rename any take using the As Take… column by double-clicking the current take name and replacing it with a new one.
- Click Save. Once the file has saved, repeat the process for remaining characters in the scene.
Hey,
this is a great explanation about anything important to know about the Story Tool. I would have compiled it nearly the same way, but you did best. 🙂
I will definitely show this to new artist in our company to get the knowledge out first and then add bits and pieces from my experience with it.
This site is very detailed and gives a perfect overview about mocap and working with motionbuilder. Are you going to add more tutorials in the future. For example dealing with constraints(basic parent or complicated relation), animating in the story tool(control rig), … .
Cheers,
Chris
Hi Chris,
Many thanks for taking the time to post a comment and for the positive feedback.
It’s great to hear you like the site and that the tutorials will be helping your new artists get up to speed.
I am going to continue to add tutorials and begin focussing on editing mocap now I covered the set-up phase.
Many thanks again for the comments,
Mo