The Control Rig is one of the 3 ways you can animate a character in MotionBuilder. It is MotionBuilder’s Full Body FK/IK character rig and although it is designed for editing mocap, it can also be used for animating characters – it just requires a little translation into more animator friendly terminology.
Because the Control Rig was originally designed to edit motion capture, much of the terminology and work-flows can seem strange to animators accustomed to working with character rigs in other 3D packages. Concepts like “pinning” make sense when you are editing mocap as you want to “pin” the position of a character’s limb to maintains it’s position while you adjust another part of the character. But if you are trying to animate with the rig, concepts like pinning don’t immediately make sense to animators more familiar with terms like “animation space” typically used in an animation rig. The full body IK rig helps adjusts the position of the entire body so a limb can reach and IK goal which is useful when you’re remapping mocap between characters of different proportions and you need a joint to be in a certain position. But if you’re trying to position a character’s arm to create a key pose and dragging it a little too far causes the full body IK to reposition the rest of your character, breaking your pose, that can get very annoying, very quickly.
To understand how the Control Rig works, and get the best results without wanting to kill it, there are 3 main concepts you will need to understand: Keying Mode, Pinning and IK Blend
Keying Modes
The keying mode specifies where keys are set on the Control Rig and changes the scope of IK solution when you interact with it. There are three main types of keying mode: Full Body, Body Part and Selection.
Full Body
Full body mode sets the rig to behave like a full body IK rig, where moving a controller beyond it’s limit will cause the rest of the body to adjust to compensate. Think of it like pulling a rag doll on the floor; if you pull the wrist, the rest of the body will drag along behind it. This automatic behaviour can be limited using Effector Pinning, but it can require constant updating to prevent other parts of the rig accidentally moving. Full body mode also sets a key frame on every controller in the rig, every time you set a key. While this can be useful for quickly blocking out key poses, as you begin to refine your animation it will create lots of unnecessary keys frames on the rest of effectors in the rig.
Body Part
Body Part mode causes the rig to behave in a similar way to a broken hierarchy rig, grouping the controls into the major sections of body: the hips, head and chest; and the left and right arms, legs, fingers and toes. Moving a controller in a particular “Body Part” will only affect the effectors in that group and it’s children (i.e. adjusting the chest controller will adjust the position of the chest and it’s child body group; both arms and the head) This behaviour can be limited using a simple “Pinning” set-up that doesn’t require constant adjustment. Body part keying mode only sets a key to the Body Part group you have selected making it much easier to control where keys are set. While in Body Part keying mode it is still possible to adjust and key multiple Body Parts simultaneously by selecting each Body Part using Ctrl+Left-click.
Selection
Selection mode allows you to specify exactly how the rig behaves when you interact with it, where keys are created and what channels are keyed. By default, with no IK Blends active, the Control Rig can only be posed using Forward Kinematics (FK) i.e. rotating each joint in turn into the correct position. To pose the Control Rig using translation/Inverse Kinematics (IK) you must first activate the IK Blend T before the rig will respond. The problem with this is, any animation or positioning on the FK rig will be overridden by the IK rig, and the limb will also interpolate between key frames using IK, which may not be what you want. Also, because the FK and IK rigs are never synchronised, even when you set a key, changing the IK Blend values may cause the limb to move to a different position. (To help identify exactly where the two rigs are, turn off “Align Control Rig” and “Double Solving” in the Properties window of the Control Rig.) Selection mode also uses the keying mode in the Key Controls window to determine which channel or properties to key. While this allows you key any channel or property on the rig, you will also need to make sure you have the correct keying mode set in the Key Controls>Keying Mode drop down before you set a keyframe.
Suggested Settings:
For most editing and animation Body Part is a good option to use. It gives the best compromise between flexibility and ease of use; allowing you to pose the rig in both FK and IK without the need to constantly switch pin settings or keep track of different skeletons, and only set keys on the effectors you have selected.
Pinning
The term pinning initially makes more sense when you are editing mocap than it does when key framing. If you are editing mocap, the term “Pin” implies a way to “pin” a controller or body part in space so it doesn’t move when you adjust another controller. But when you are animating, pinning doesn’t immediately make that much sense until you think of it is as changing the animation space of a controller from “Local Space” (UNPINNED) to “World Space”(PINNED). By default the rig behaves as if the IK controls are parented together, where rotating one controller will move all the other effectors down the body, for example rotating the chest control affects the wrist control. However, when you pin the translation or rotation of the wrist control, it behaves like it’s animation space has been set to world space and so doesn’t inherit the translation or rotation of it’s parent controller, the chest. Changing the pin setting or animation space in this way only affects the way the character behaves when you interact with it, allowing you to turn them on or off at any time without affecting how the animation will play back. If you want to release all the pinning setting on your character to quickly position the entire rig, you can use the “Release All Pinning” button in the Character Controls tab or pressing q.
PLEASE NOTE:
Unless you are familiar with the MotionBuilder keyboard short-cuts, change them to your preferred 3D package because the short-cuts for pin translation and rotation are the same as the translation and rotation short-cuts in other packages!
Suggested Settings:
(For pre MoBu 2014 you must activate the associated Reach/IK Blend for pinning to work in Body parts; i.e. when pinning Rotation activate Reach R/IK Blend R )
To create “World Space” IK hands and feet, pin the Translation and Rotation of the Wrist and Ankle effectors. Translating the Elbow and Knee effectors will replicate a Pole-vector constraint.
To create a broken hierarchy effect, where the rotation of one one effector does not affect it’s children; pin the rotations on the shoulders, head, upper legs, and spine end and origin.
IK Blend T/R
PLEASE NOTE: PRE MOTIONBUILDER 2013 IK BLEND T/R WAS CALLED REACH T/R
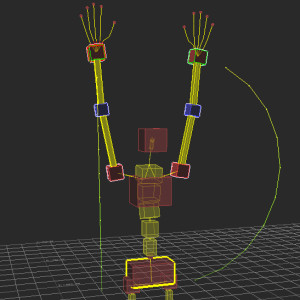
The IK Blend settings define how the Control Rig interpolates between the FK and IK rigs at the sub key frame level, in much the same way as IK blend settings work in other 3D packages. When you create a key frame in MotionBuilder, the position of FK and IK controls are synchronised – unless you are in Body part mode. However, when the Control Rig interpolates between these key frames, the FK and IK controls are not synchronised and do not interpolate in the same way. FK controls interpolate in an arc using rotations and IK controls interpolate in a straight line using translation. Adjusting the IK Blend settings on a controller allows you to specify how that controller will interpolate between key frames. For instance, position the character’s arms by it’s side and set a key frame. Then go to frame 10 and rotate them above it’s head, as though surrendering, and set another key frame. Now set the IK Blend T for the Right Wrist Effector to 100%. When you scrub through the animation you will notice the left arms rotates up into position while the right arm translates up in a straight line. (To make this more obvious, turn on trajectories to show the different paths)
To see the results of any edits you make in the FCurve window, the IK Blend settings on the controller must match the keys and channels you are editing. For example, editing the rotation values on a the shoulder effector will have no visible effect if the IK Blend R is turned off.
Suggested Settings:
If it swings like the arms or curls like the fingers or spine it’s best to use FK. It it needs to move in a straight line or stay fixed in position, like feet on the floor, use IK.
Using The Control Rig
A CONTROL RIG CAN ONLY BE APPLIED TO CHARACTERS THAT HAVE BEEN CHARACTERIZED!
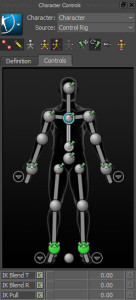
- To select an effector: Select it in the Viewer window or click its corresponding cell in the Character Controls window > Character representation
- To select multiple effectors: Ctrl-click to select them in the Viewer window, or Ctrl-click multiple cells in the Character representation
- To select all effectors in a body part: Shift-click an effector within the body part hierarchy that you want to select e.g shift+left click the Right Knee Effector to select all the effectors in the right leg.
- To Select all effectors in a view: Left click in an empty space in the Character Controls>Controls window.
- To de-select all controller in a view: Left click in an empty space in the Character Controls>Controls window.
- To edit existing mocap data or animation you must plot the animation to the control rig first before you can edit it.
- When you have finished animating/editing you must plot the data back to your character skeleton, remembering to include any extra nodes, before you export it.
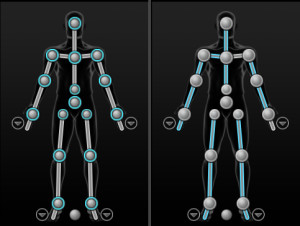
- Selecting IK or FK Controllers. Clicking the circles selects the IK effectors. Selecting the bones, the bit in between the IK effectors, selects the FK effectors.
- If you are animating the spine, neck or fingers using the FK effectors, set the rotation manipulator to Local space so the rotations are shared evenly across the joints achieving a nice curve. Rotating the FK effectors in world space will only rotate the first joint of the joint chain.
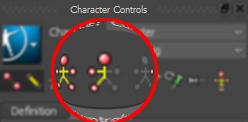
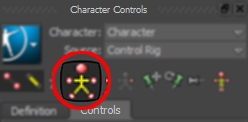
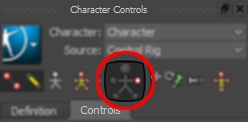
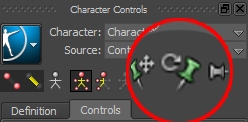

Hi, is there any way to prevent the selection of all the effectors from occurring if I click on the empty space in the Character Controls window?
Sometimes, if I mistakenly click in that empty space, it takes some time to select all the effectors and then I have to deselect them. Seems as if there should be a selection mode to stop this.
Hi,
I don’t think there is I’m afraid.
If you select the effectors in the Viewer window, you can use “undo” if you accidentally select the wrong one, but this doesn’t work in the Character Controls window.