In this tutorial you will learn how to successfully characterize your character in MotionBuilder.
Before you can begin using the character animation features in MotionBuilder you need to Characterize your character. The process involves 3 main steps:
- T-Posing – This is the most import part of the process, requiring accurate alignment of the character’s limbs.
- Character Mapping – Completing the “Mapping List” defines the character hierarchy so MotionBuilder can understand it.
- Characterize – The easy bit! Once the Characterize box is ticked, MotionBuilder will recognises the character as a character that can be animated using the Control rig, Actor asset, or another characters.
01 Put the Character in a T-Pose
Aligning your character in the correct T-Pose (T-Stance) is the most important part of the Characterization process. All the re-targeting and IK solver calculations are based on this pose, so it must be done as accurately as possible.
The character should be standing upright, looking directly ahead with its arms out to the side in a “T” shaped pose. All the character’s limbs should appear straight, but the actual joint can be bent. For example, characters are often rigged with a curved spine, and a slight bend at the knees and elbows to help the IK. Adding a small bend to an arm or leg can help reduce overextension or “popping”. But if the bend is too big, the limb will always look bent.
It is possible to create offsets between characters with different postures when you characterize them. For example, leaving a hunched character’s back curved during characterization will offset it from the position of an upright character. But this variation can create other unwanted behaviour in the Control Rig and when re-targeting.
Centre the Character
Position the character at the centre of the scene, facing down the positive Z-axis.
- Zero X and Z Translation Values: Switch to “Global” (F6) “Translation Mode” (t) and select the root of your character’s skeleton, usually the hips. In the X and Z fields of the “Global/Local” fields in the bottom right corner of the Viewer window, type “0”.

- Align Feet to Floor: Switch to a front view (Ctrl+f) or side view (Ctrl+r) and zoom in on the feet. Still in “Global Translation Mode”, align the character’s feet to the floor using one of the following methods:
- Manipulator: Left-Click drag the Y axis of the manipulator in the “Viewer” window.
- XYZ Mode: Change to “XYZ Mode” in the top right corner of the Viewer window, and Middle-Click Drag up and down in the “Viewer” window.
- Adjust Global Values: Left or Right-Click Drag the Y value in “Global/Local” fields to adjust the value by 1.0 or 0.1 units.
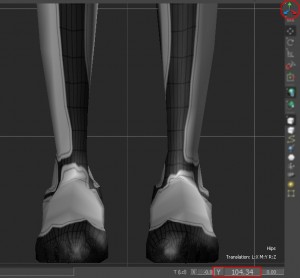
- Align down Positive Z: With the Hips still selected, change to Rotate mode (r). Using one of the methods above, globally rotate the character in Y until it is facing down the positive Z axis. The character should be facing you in the Front orthographic view (Ctrl+f).
Rotate the Arms Horizontally
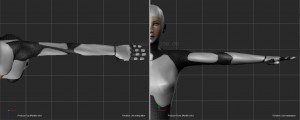
Rotate the joints in the arm so the arms are at right angles to the body, pointing down the X-axis.
- Align the Shoulder: Rotate the clavicle until the shoulder mesh is in a neutral position. You can check this by rotating the arms down by the character’s side. The arms should look like the character is standing normally. Sometime characters are built and rigged in this position so it’s worth checking with modelling and rigging first.
- Align the Arm: Rotate the “Upper arm” joint until it is at a right angles to the body. The “Shoulder”, “Elbow” and “Wrist” should form a straight line in the front view. The “lower arm” should bend forward at the elbow while staying parallel to the floor.
- Align the Hand and Fingers: Rotate the hand so it is flat, with the palm towards the floor. Straighten the fingers, making sure they are not spread apart or twisted. Align the thumb against the side of the hand along the X-axis, with the nail facing forward.
Straighten Legs and Feet
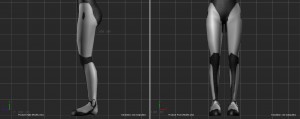
Rotate the legs until they are vertical. The knees, feet and toes should point down the positive Z-axis.
- Align the Leg: Rotate the joints in the leg until the mesh looks straight. The “Hip”, “Knee” and “Ankle” should form a straight line in the front view. The “Lower leg” should bend backward at the “Knee” and stay in-line with the “Upper Leg”. Remember: If you rotate the legs, you will need to reposition the “Hips” so the character’s feet back are on the floor.
- Align the Feet and Toes: Rotate the character’s feet so they are flat on the floor, pointing down the positive Z-axis. Straighten the toes along the Z-axis, making sure they are not spread apart or twisted.
Check the Spine, Neck and Head Alignment
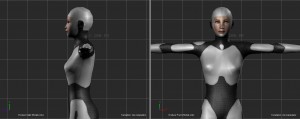
The Spine, Neck and Head are usually built and rigged in the correct position for Characterization. Unless you really need to adjust them, they can be left as they are.
- Spine Alignment: The character’s back should be in its natural standing position. As mentioned at the start, this could mean the character has a curved back.
- Neck and Head Alignment: The character should be looking down the positive Z-axis in a default “looking-straight-ahead” pose.
02 Complete Character Mapping
Before you can Characterize a character, you need to describe its structure in a way that MotionBuilder can understand. This is done by adding the joints to the correct slot in the “Mapping List” or “Character Definition” window. This process is called “Character Mapping”.
The “Mapping List” connects the joints in your character to a set of pre-defined nodes that exist in every characterized character. These nodes are used by MotionBuilder to remap animation and build the Control Rigs.
There are 2 ways to complete the Character Mapping process: Automatically and Manually:
- Automatically as the name suggests, automatically complete the Mapping List but a pre-defined naming convention must be used
- Manually allows any naming convention to be used but each joint must be added to the Mapping List by hand. Once complete, a “Custom Character” or “Skeleton Definition” file can be created. This file can then be used to automatically complete the Character Mapping on any character using the same joint naming convention.
Automatically
MotionBuilder will automagically complete the “Mapping List” if the skeleton joints have been named using the MotionBuilder HIK naming convention.
…using Drag-And-Drop
- Drag Character onto Bones: In the “Asset Browser>Templates>Characters” folder, select a “Character” asset and Left-Click drag it onto any joint in the character. Click “Characterize” in the pop-up menu followed by “Biped” in the “Character” window. If any of the “Base (required)” joints aren’t found, a “Character Definition Error” window will display the missing joints. If the process is successful, you can jump to Adjusting Floor Contact Markers.
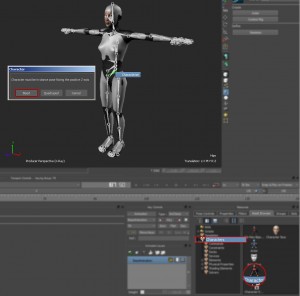
- Drag Bones into Mapping List: Left-Click+Drag a “Character” from the “Asset Browser>Templates>Characters” folder into the “Viewer” window. Ctrl+Shift+Right-Click any part of the character to select the entire hierarchy. Open the “Scene Browser>Characters>Character Definition” pane and Alt+Left-Click Drag the selected objects from the “Viewer” window into the “Mapping List” column.
…using XML Naming Template
- Add a Character Asset: From the “Asset Browser>Templates>Characters” folder drag a “Character” asset into the “Viewer” window.
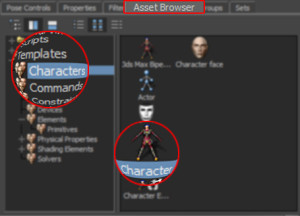
- Select Joints: If you only want to apply the “Template Matching” to specific joints, select only those joints. Otherwise select any joint in the character hierarchy.
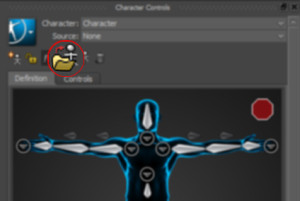
- Load Skeleton Definition: Open the “Load Skeleton Definition” dialogue window by clicking the “Load Skeleton Definition” icon in “Character Controls>Definition” tab.
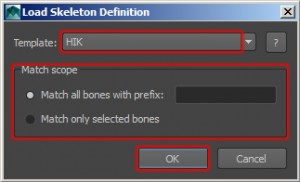
- Select Template. In the Load Skeleton Definition dialogue box select the “HIK” naming template from the drop down menu.
- Set Match Scope Settings: Select the “Match scope” settings for the naming template.
- Match all bones with prefix – will apply the naming template to any joint containing the prefix in this field and the suffix in the mapping template. A suggested prefix is generated based on the joint you have selected. You can change the suggested prefix by clicking the text box and typing a new name. Or you can delete the text and leave the field blank.
- Match only selected bones – will limit the template matching to selected joints ONLY. If you selected a specific set of joints in step 2, use this option.
- Apply: Click “Ok” to apply the Naming template.
- Check Characterization is Valid: Before you Characterize the character, check the “Mapping List” has been filled in correctly and the characterization is valid – the red hexagon at the top of the “Definition” tab will change to a green circle. Any joints that are invalid will be coloured yellow. Clicking on them will display the error in “Validation status” section of the Definition tab.
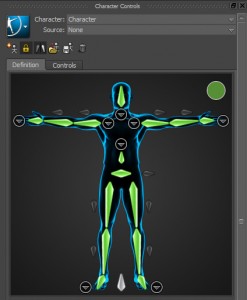
Manually
The “Base (required)” section of the “Mapping List” must be complete before you can Characterize your character. These are the minimum nodes required by MotionBuilder to remap an animation or create a control rig. The other sections are optional, but I would fill in as many as possible to get the best results from the HIK/MB Character Solver.
- Add a Character to the scene: From the “Asset Browser>Templates>Characters” folder drag a “Character” asset into the “Viewer” window.

- Define the Character Hierarchy: Add each of the joints in the character to the correct slot in the Character Definition. Depending on the version of MotionBuilder you are using, there are 2 ways to do this:
- using the Navigator>Scene Browser>Character>Character Definition pane
- using the Character Controls> Character Definition tab
- Add a Reference Object: Add the “Reference” null or the direct parent of the character’s “Hips” to the “Reference” slot in the “Mapping List”. MotionBuilder uses the “Reference” node to translate, rotate and scale the entire character.
- Leave Floor fields blank: Unless you need to define a specific floor height you can leave the Left and Right Hand and Foot Floor fields blank. MotionBuilder will use the grid, zero height, as the default height of the floor if nothing is specified.
…in the Character Definition Pane
- Open the Mapping List: Double-Click the Character in the “Scene Browser>Characters” window. Open the “Character Definition” tab and activate the “Lock Asset Type” button. This will stop the “Asset Settings” window changing if you accidentally Double-Click an object. Don’t forget to turn this off once you’ve completed the “Mapping List”.
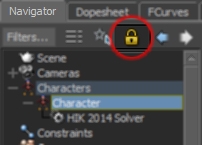
- Adding to the Mapping List: Expand each section of the list and Alt+Left-Click-Drag joints from the “Viewer” window or “Scene Browser” into the correct slot in the “Mapping List”.
- To Alt+Left-Click-Drag an Object: Left-Click select the object – it should turn green. Reposition your cursor over the object and, holding down “Alt”, Left-Click-Drag the object. If the “drag” is successful, a tiny box with lines in will appear next to your cursor. If a red circle with a line through appears, it means you cannot “drop” the object in its current location.
- Removing from the Mapping List: Double-Click the name of the object in the “Mapping List” column to select it. Make sure all the text in the box is selected, delete it and press return. You should see “<Drop Object Here>” reappear in the slot.
- Clearing the Mapping List: To clear the entire “Mapping List”, click “Clear Mapping List” in the “Character Definition” tab. In the “Clear Mapping List” pop-up dialogue box, click “OK”. This will remove EVERY object from the “Mapping List”.

…in the Character Definition Tab
- Activate Mirror Matching: In the “Character Controls>Definition” tab, turn on “Mirror Matching”. Several joints in a typical character hierarchy have a mirror opposite. This is usually represented in their names. For example “LeftHand” and “RightHand”. “Mirror Matching” takes advantage of this by looking for a “mirrored” version of the selected joint’s name in the character’s hierarchy. If it finds one, the tool will automatically add that joint to the opposite slot in the “Character Definition”. For example, if you add “LeftHand” joint to the “LeftHand” slot, the tool will look for a joint named “RightHand”. If it finds one, it will automatically add it to the “mirrored” “RightHand” slot.
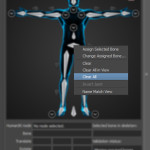
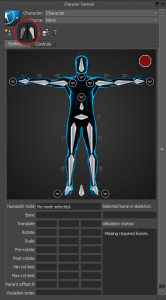 Assign Object to Selected Cell: Double-Click a joint cell in the “Character Controls>Definition” window – the selected cell will have a blue border and the other cells will go dark. In the “Viewer” window, Left-Click the joint to add to the cell.
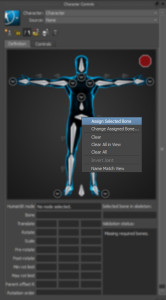
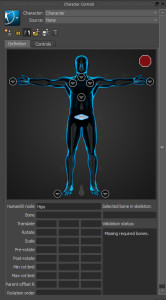 Assign Selected Object to Cell: Select a joint in in the “Viewer” window. In the “Character Controls>Definition” window, Right-Click the cell you want to add the join to. From the pop-up menu select “Assign Selected Bone”. The joint cell will turn green to indicate the joint is valid.
- Change Assigned Bone: Right-Click the cell in the “Character Controls>Definition” tab and select “Change Assigned Bone” from the pop-up menu. Type the name of the correct joint in the text box or select it from the drop-down list. Then, click Ok.
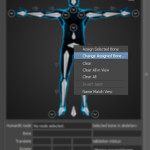 Clear a Cell: Right-Click the cell in the “Character Controls>Definition” tab and select “Clear” from the pop-up menu.
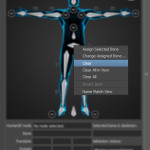 Clear All Joint Cells in Current View: Right-Click anywhere in the “Character Controls>Definition” tab and select “Clear All in View” from the menu. This will only clear the cells in the current view. For example, full body, hands, feet, shoulder, spine or neck.
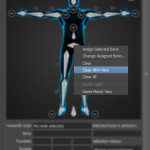 To Clear All Joints Cells: Right-Click anywhere in any view in the “Character Controls>Definition” tab and select “Clear All” from the menu.
03 Characterize
Once you have completed the “Mapping List” you can activate the defined Character Map to “Characterize” your character. MotionBuilder now recognises the skeleton hierarchy as a character that can be animated.
Activate Characterization
- Check the following:
- The character is facing down the positive Z-axis
- It is standing in a T-pose
- The joints have been assigned to the correct slot in the “Mapping List”.
- Characterize: Click the “Characterize” option in the “Character Definition” pane or the “Lock Character” button in “Character Controls>Definition”tab.
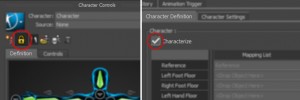
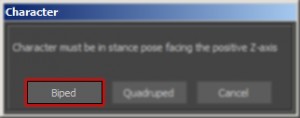
- Select Biped: From the “Character” pop-up window click the “Biped” button.
Adjust Floor Contact Markers
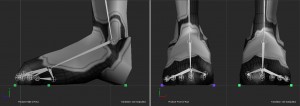
The Floor Contact Markers are the purple and green cubes that appear around your character’s hands and feet when you Characterize it. If “Floor Contacts” are turned on in “Character Setting>Modifiers” these markers will automatically stop the character’s hands and feet going through the floor. If floor objects weren’t added to the “Mapping List”, the default floor will be 0 in the Y-axis.
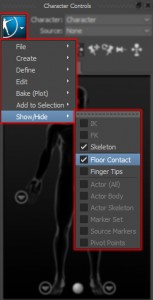
- Show Floor Contacts: In the “Character Controls>Show/Hide” menu, tick “Floor Contact”. You need to be using “Normal” or “X-Ray” viewing modes to see the Floor Contacts.
- Align Markers: In a side orthographic view, Translate (t) the markers to the heel, ball and tip of the character’s toes. In the front view, align the markers with the side of character’s feet. Any adjustments you make to one set of markers will be automatically mirrored on the opposite side.
Rename the Character Asset
To make it easy to find the Character and avoid naming conflicts later, rename it to something more descriptive. For example, the actual name of the character.
- Select Character Asset: In the “Navigator>Scene Browser” window expand the “Characters” branch.
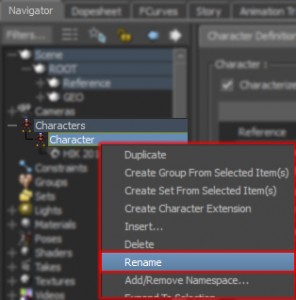
- Rename: Right-Click the “Character” asset and select “Rename” from the pop-up menu. In the text box that appears, type a new name and hit Enter.
Add Namespace
A namespace groups a collection of items under one name. The namespace is added to the front of the item’s original name and separated by a colon (e.g. <NAMESPACE> : <ITEM_NAME>). This lets you have items in a scene with the same name, but in different namespaces.
The other advantage of namespaces are, you can select all the items in a namespace or all the items with a certain name. For example, you could have 2 characters with the same joint names using different namespace. To select all the objects in a character’s namespace, use “Edit>Select By Namespace…” To Select a certain joint in both joint hierarchies, use shift+n (“Find Model By Name”) and search for “*:<ITEM_NAME>” (starting the search string with “*:” will search any namespace)
- Clear Selection: Double-Click in an empty area of the “Viewer” window or press shift+d on the keyboard. This will make sure you have nothing selected.
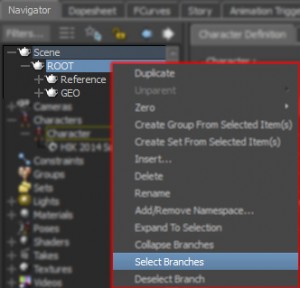
- Select Assets: In the “Navigator>Scene Browser” window, Right-Click the top node in your character’s hierarchy and choose “Select Branches” from the pop-up menu. This will select all the assets associated with the character, including the Character, Constraints, Materials, etc.
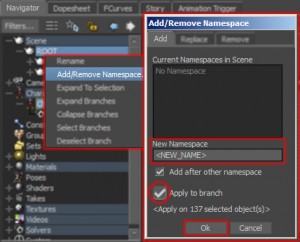
- Add Namespace: With all the assets selected, Right-Click the top node of the character’s hierarchy again and select “Add/Remove Namespace…” from the menu. In the “Add/Remove Namespace” window, go to the “Add” tab. Type a namespace in the “New Namespace” field and select “Apply to branch”. Finally, click “OK” to assign the namespace to the selected objects.
Editing a Characterized Character
To adjust the T-Pose or edit the Mapping List after Characterization, you need to disable the “Characterize” option. Then, when you’ve made your changes, reactivate it.
You must put the character in a T-Pose BEFORE you disable the Characterize option
- Set to Stance: In the “Character Settings” tab, set the “Input Type:” to “Stance” and click “Active”. Or from “Character Controls>Source:” select “Stance” from the drop-down menu. This returns the character to the T-Pose it was characterized in.

- Deactivate Characterization: In the “Character Definition” tab, un-tick “Characterize” and click “Ok” in the “Character” window. Or, in “Character Controls>Definition”, click the “Lock Character” icon. You should now be able to edit the “Mapping List” and adjust the character’s T-Pose.
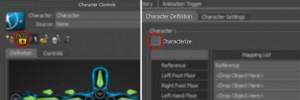
- Reactivate Characterize Option: When you’ve finished editing, reactivate the Characterization again.
Using Custom Bone Names
If you’re using other characters with the same custom bone names, create a “Skeleton Definition File” or “Custom Character Asset”. These files will save you time by automatically complete the Character Mapping process.
Hey Mo, just a comment to say that this tutorial is another good one, however theres one step you didnt cover which was how to characterise the character using an actor as reference
“8. Activating Actor and Character. To activate the Character, select the Character under Characters in the left side
of Navigator, click on the Character Settings tab, and choose Actor Input as Input Type. Turn on Active. (See the
screen capture below).
To re-activate the Actor, select the Actor under Actors in the left side of Navigator, click on the Actor Settings tab
and click on Activate. If you scrub through the time line, you should now see your Actor moving your Character.”
Hi Aaron,
Thanks for the positive feedback. It’s really good to hear if I’m not making sense or missing something out in these tutorials.
Saying that though I’m not sure I understand exactly what you mean by “how to characterise the character using an actor as reference”. Are you talking about using the Actor as the Input for the character?
Hi Mocappy, you also left out a very important part which is why I read through this in the first place..Using the standard biped character, how EXACTLY do you alt+drag and drop the essential parts in? You missed that part out, and any configurations I use just dont work. Please email me a screenshot if you have a chance? Thanks
Hi,
To alt+drag an object in MotionBuilder
select the object in the Viewer or Schematic window
press and hold alt+LMB (Left Mouse Button)
drag the object in to the correct filed.
Hope this answers your question
Mo
Hey guys, I would like to ask your advise in this situation if possible: I have a working characterized mesh on motionbuilder that is animated from mocap. That character’s mesh needs to be replaced… So I want to merge another character(final mesh) into my already working character (placeholder mesh). It doesn’t seem to work. I merge my final character into the scene (it is already binded to a new skeleton), I then characterize it and set the source to be the old character. The new skeleton follows it like it should, but the new mesh is gone when I change the take. Any thoughts on a better pipeline to replace the old mesh? Thank you for your time.
Hi Bianca,
If you already have an animated characterised rig you should be able to import the animation from that rig onto the the new mesh rig.
Depending on your version of MotionBuilder you can do this during the File>Merge by discarding all the elements in the file (right click in the elements column and select discard all) and only importing the animation(make sure the animation column has a disk icon next to the I Herts you want to import animation for and the take you want to import is checked). This will import any animation for objects with matching names.
Or you can import the animation using the character controls window Load options to import the animation from a character rig in one file onto another. Save the animation on your old character rig using the character controls >File >Save Character Animation option. Open the new character file and in Character Controls Select > File > Load Character Animation and select the .fbx file containing the animation you want yo load and click Open. In the Load Options select the Retarget option. Make sure the take you want to retarget is selected in the Take list and click open.
Hope this works. Let me know how you get on!
Mo
Thank you guys! retargeting worked. I want to export just the new character that I just retargeted but save options doesn’t appear to let me. Anyway I just deleted the old character in the game engine when imported.
Have you tired File > Save Selection?
In your MotionBuilder scene select all the element you want to save using the Navigator – don’t forget Characters and Constraints if you need them. (Right-click Select Branch and space bar clicking a hierarchy can help with this.)
Once you have everything selected, select File > Save Selection and save out as usual.
Oh that`s right, how did I not see that…
thanks!!
So many thanks for your help. I am a newbie of MotionBuilder . Your tutorial is the most detailed and helpful.
Thank you. Thankt’s very kind. So happy to hear it helped you.